Home CI/CD: Jenkins with Docker on Raspberry Pi
A tech recipe to set up Jenkins on a Raspberry Pi, using Docker
Ingredients:
- Raspberry Pi 3
- a Bitbucket and/or Github account
- a Bitbucket and/or Github repository
- Docker
- a domain name (No-IP)
- a Let's Encrypt certificate
The goal is to set up Jenkins on a Raspberry Pi to automate deployments for home projects.
Installing Jenkins
Log into the Pi and first update it:
sudo apt-get update && sudo apt-get upgrade
Find a Jenkins Docker image that works on your Pi infrastructure. This one works on the Raspberry Pi 3 (ARM 32):
docker pull memphisx/rpi-jenkins
Then create and run a container based on this image:
docker run -p 8080:8080 -p 50000:50000 -v /<PATH>/jenkins:/var/jenkins_home memphisx/rpi-jenkins
Explanations for this command are given here: https://www.jenkins.io/doc/book/installing/docker/
TL;DR:
-p (--publish) 8080:8080: "Maps (i.e. "publishes") port 8080 of the current container to port 8080 on the host machine. The first number represents the port on the host while the last represents the container’s port. Therefore, if you specified -p 49000:8080 for this option, you would be accessing Jenkins on your host machine through port 49000."
-p (--publish) 50000:50000: "Maps port 50000 of the current container to port 50000 on the host machine. This is only necessary if you have set up one or more inbound Jenkins agents on other machines, which in turn interact with your jenkins-blueocean container (the Jenkins "controller"). Inbound Jenkins agents communicate with the Jenkins controller through TCP port 50000 by default. You can change this port number on your Jenkins controller through the Configure Global Security page. If you were to change the TCP port for inbound Jenkins agents of your Jenkins controller to 51000 (for example), then you would need to re-run Jenkins (via this docker run … command) and specify this "publish" option with something like --publish 52000:51000, where the last value matches this changed value on the Jenkins controller and the first value is the port number on the machine hosting the Jenkins controller. Inbound Jenkins agents communicate with the Jenkins controller on that port (52000 in this example). Note that WebSocket agents do not need this configuration."
-v (--volume) jenkins-data:/var/jenkins_home: "Maps the /var/jenkins_home directory in the container to the Docker volume with the name jenkins-data. Instead of mapping the /var/jenkins_home directory to a Docker volume, you could also map this directory to one on your machine’s local file system. For example, specifying the option --volume $HOME/jenkins:/var/jenkins_home would map the container’s /var/jenkins_home directory to the jenkins subdirectory within the $HOME directory on your local machine, which would typically be /Users/<your-username>/jenkins or /home/<your-username>/jenkins. Note that if you change the source volume or directory for this, the volume from the docker:dind container above needs to be updated to match this."
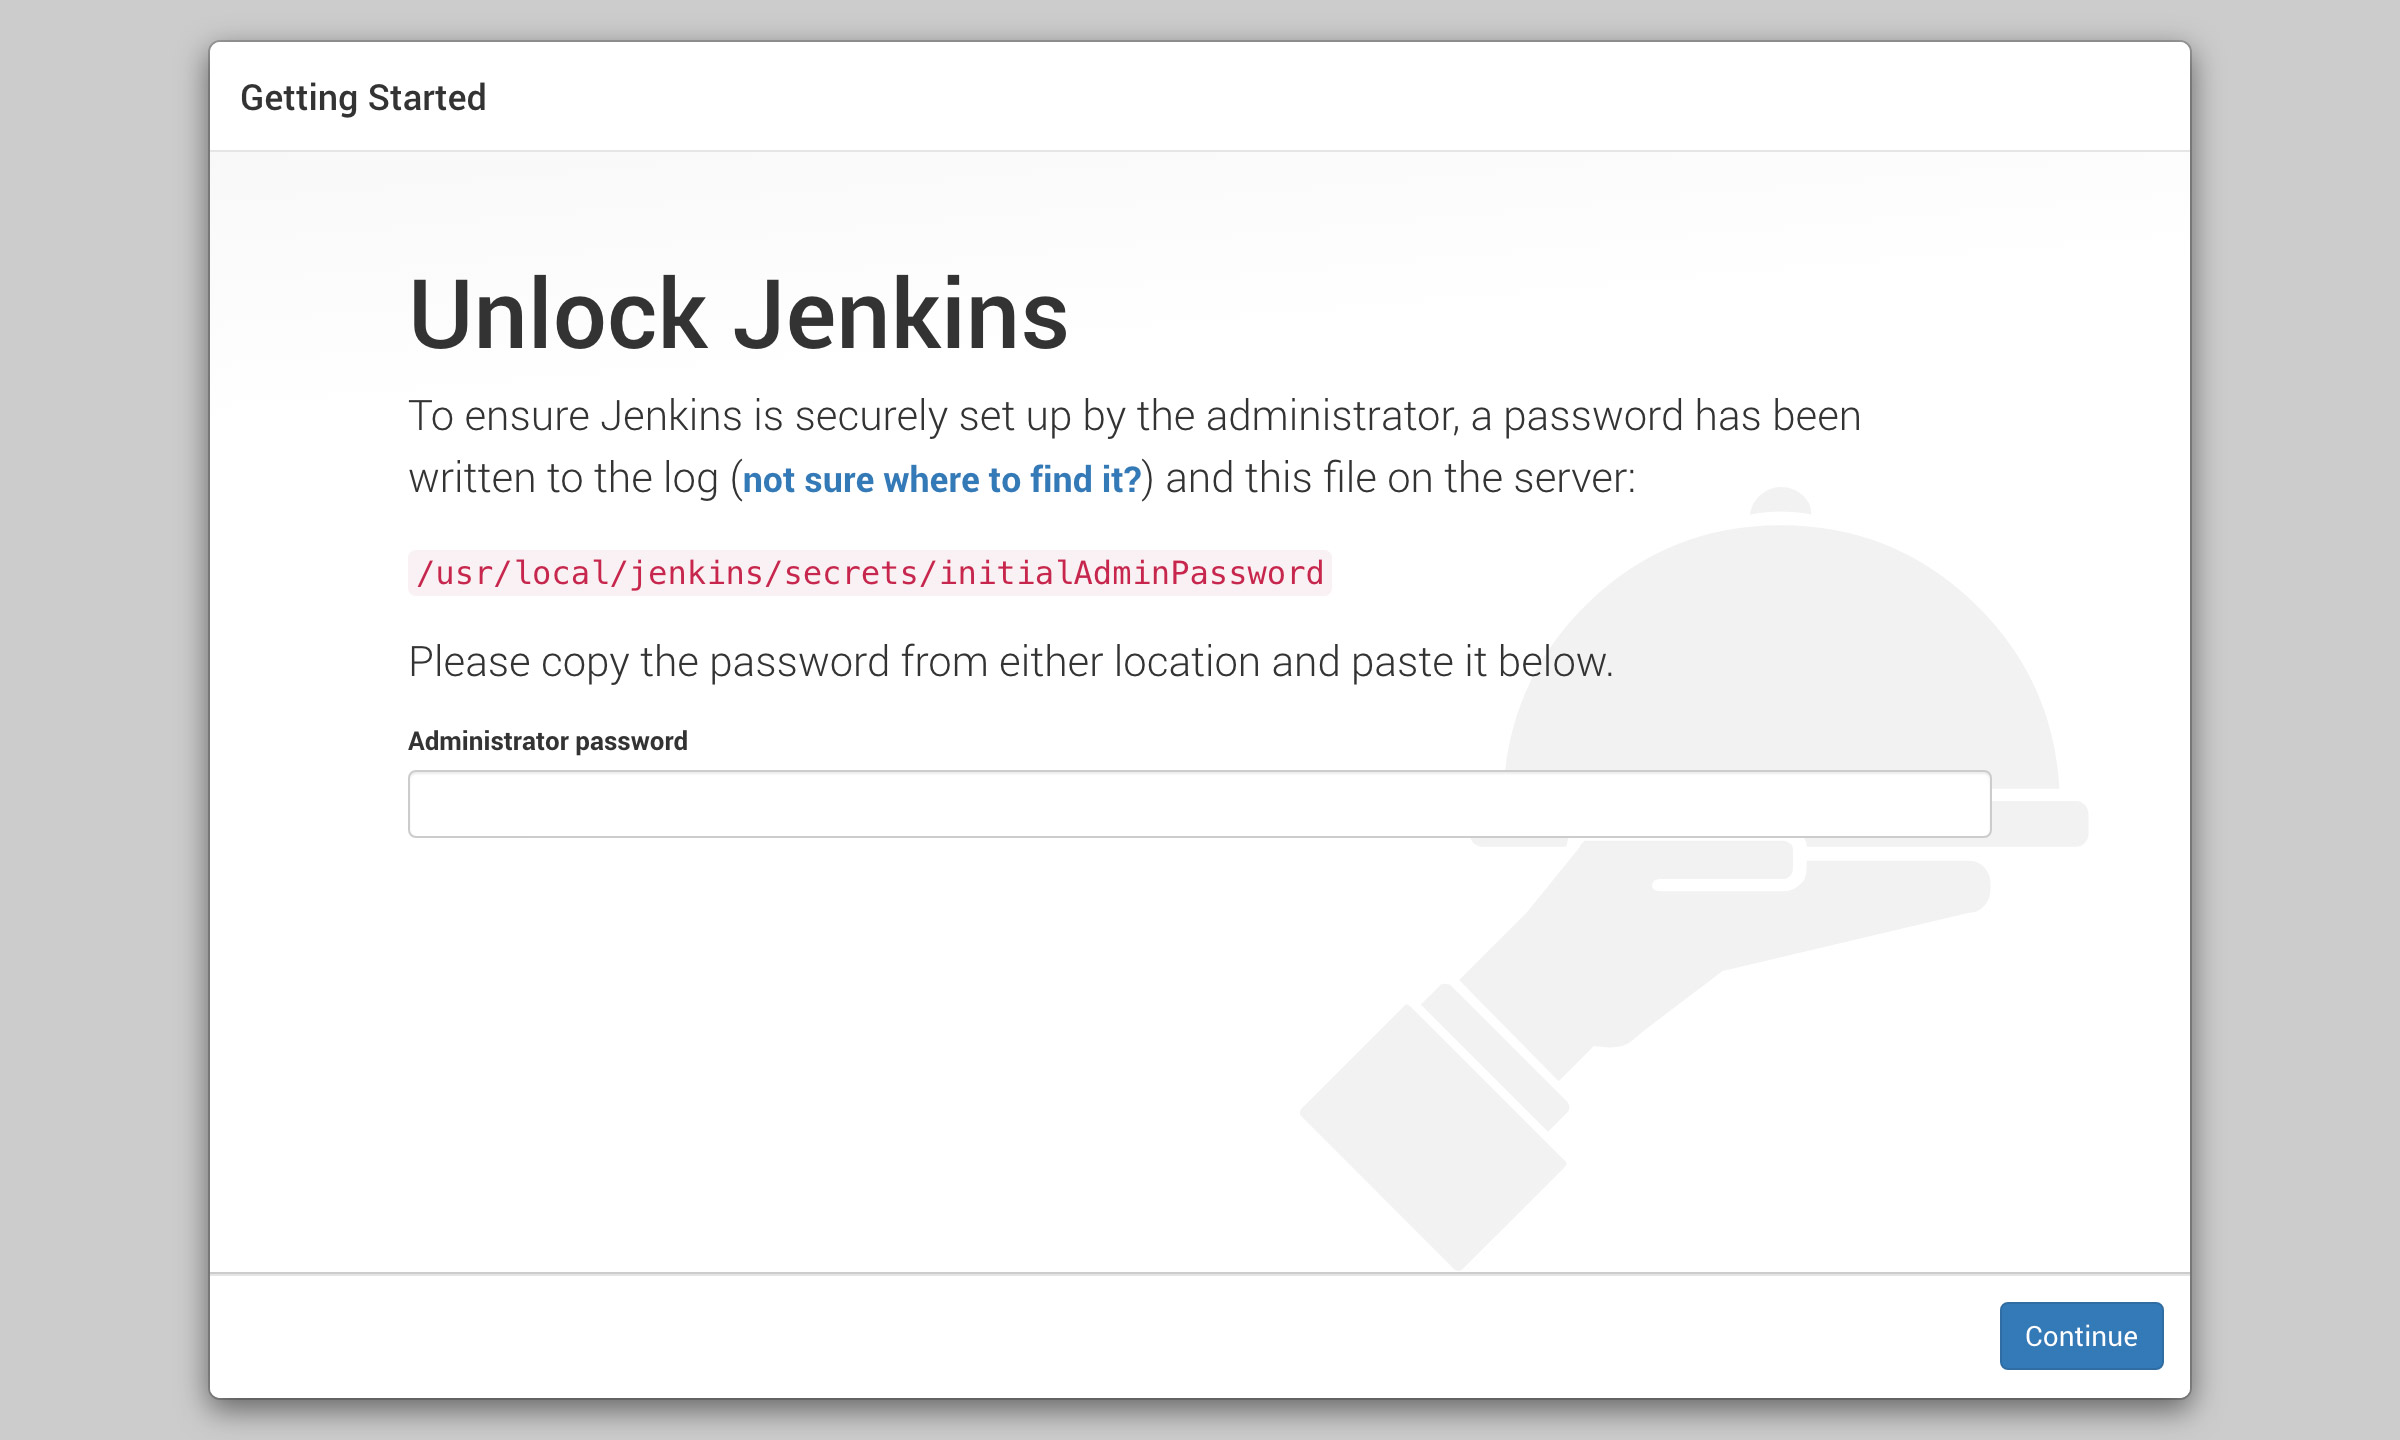
Jenkins should initialize and print back a password on the terminal:
*************************************************************
*************************************************************
*************************************************************

Jenkins initial setup is required. An admin user has been created and a password generated.
Please use the following password to proceed to installation:

<SOME_PASSWORD>

This may also be found at: /usr/local/jenkins/secrets/initialAdminPassword

*************************************************************
*************************************************************
*************************************************************
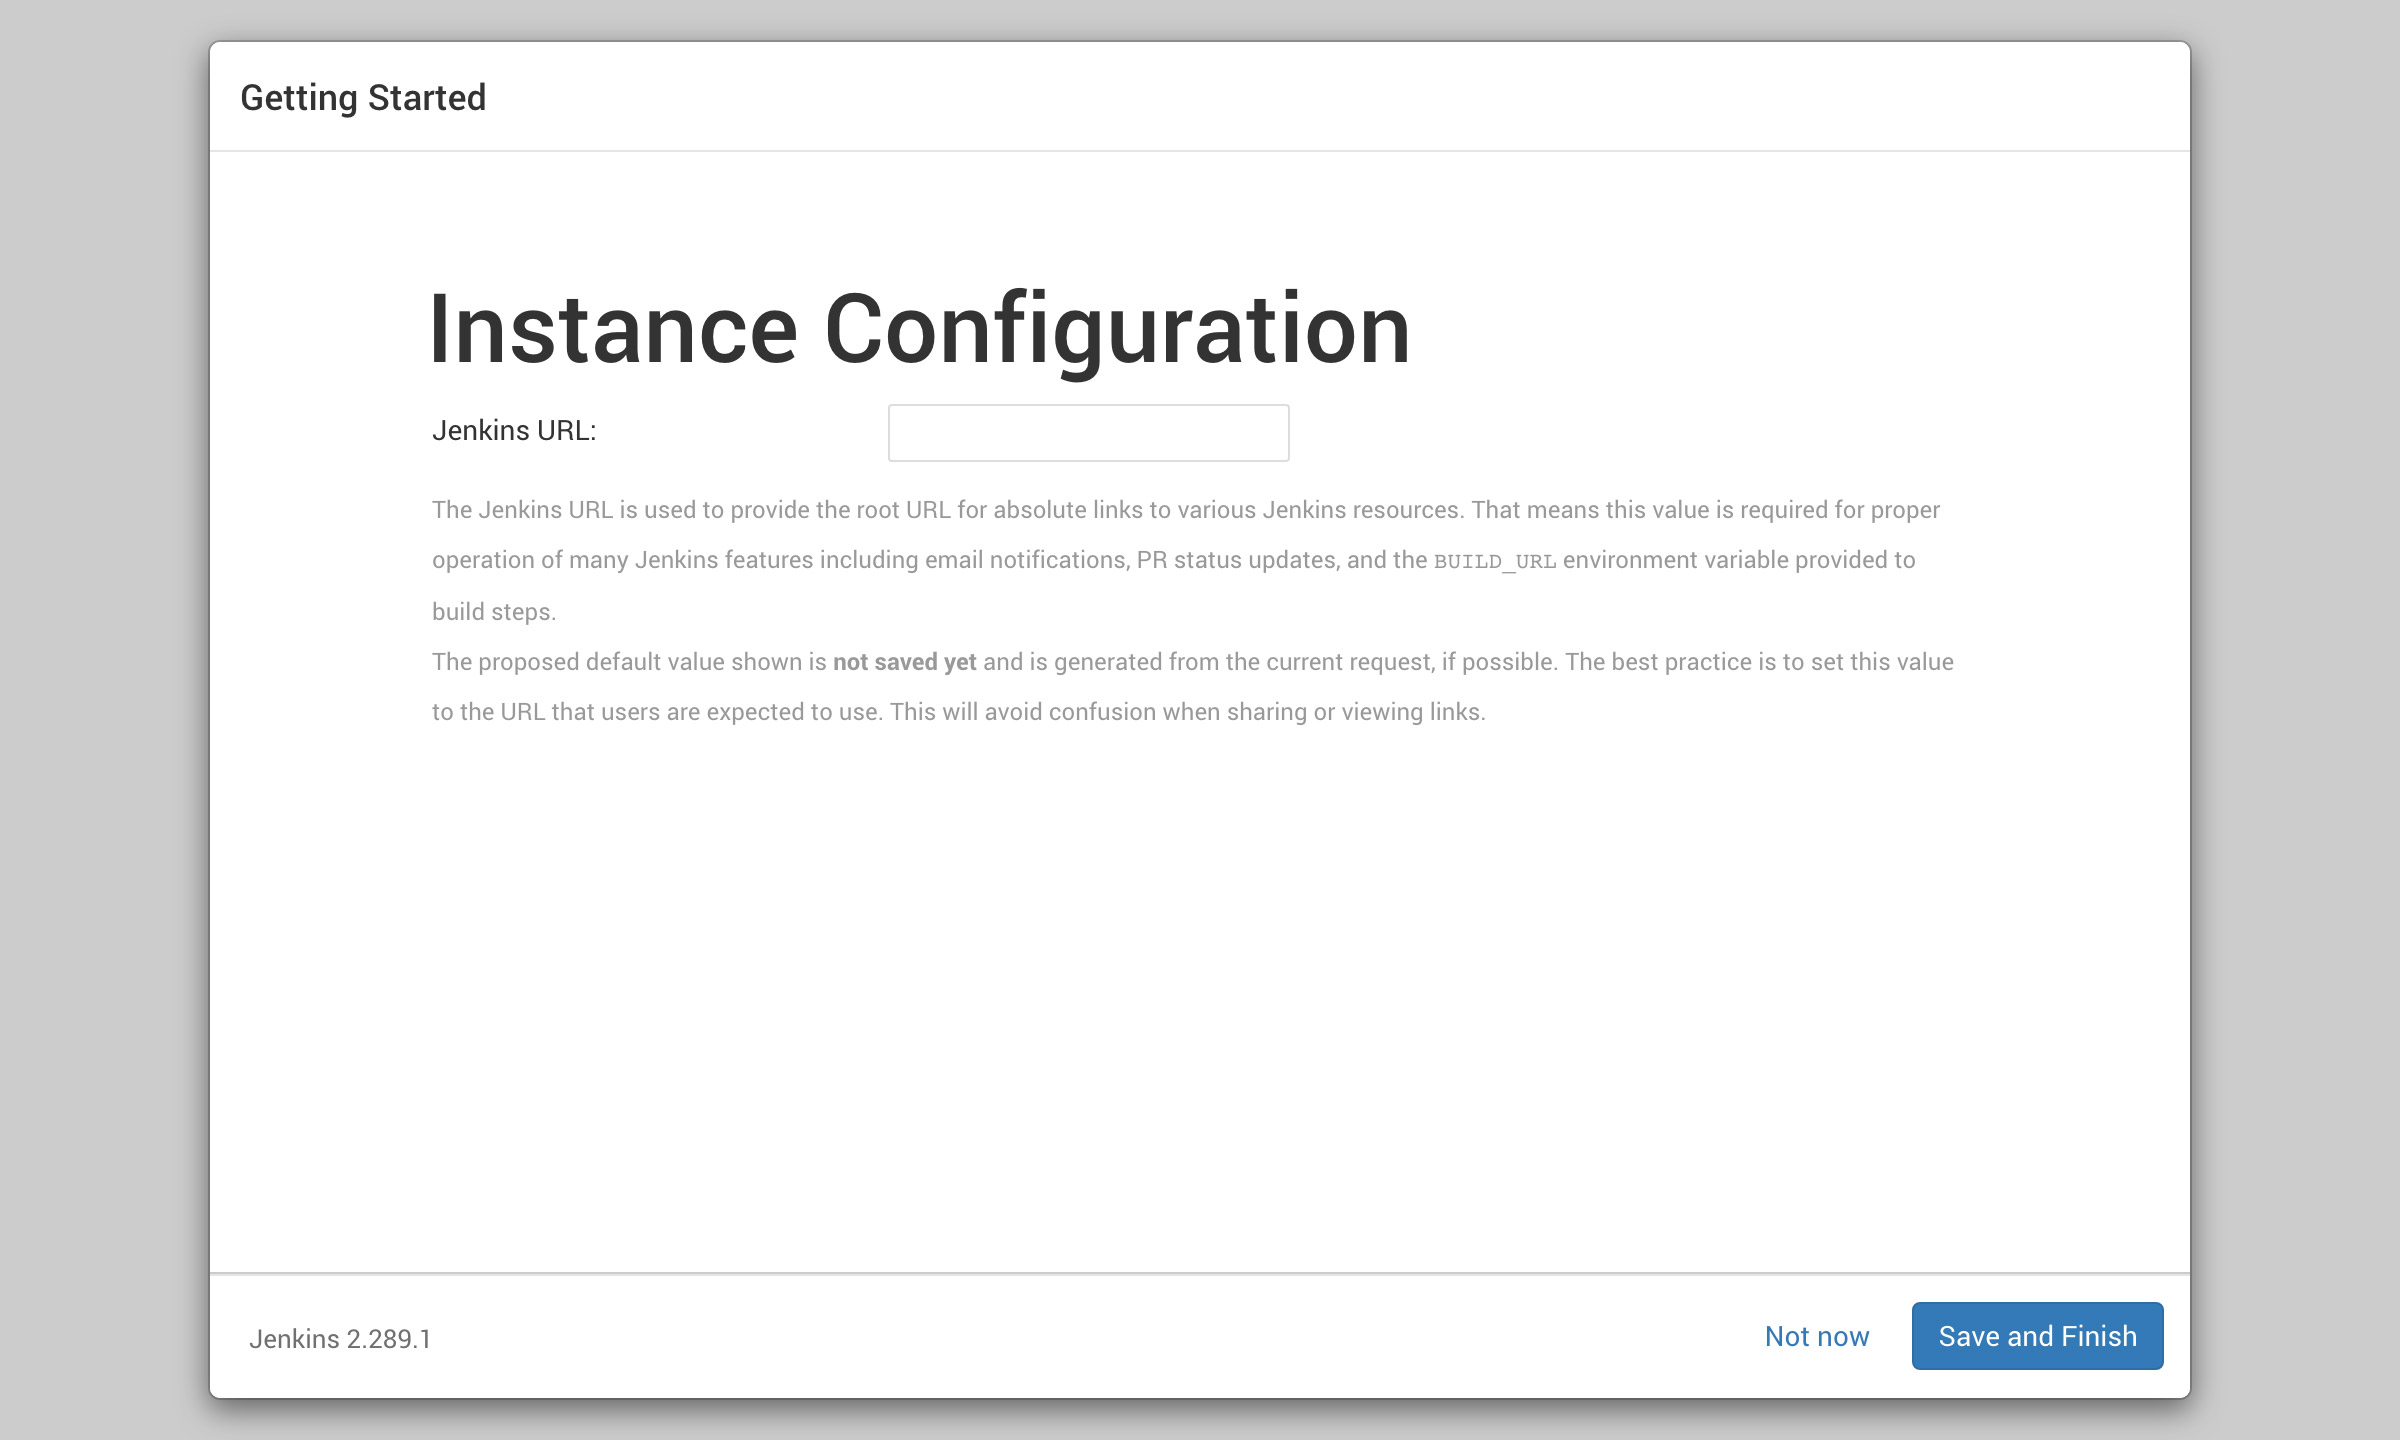
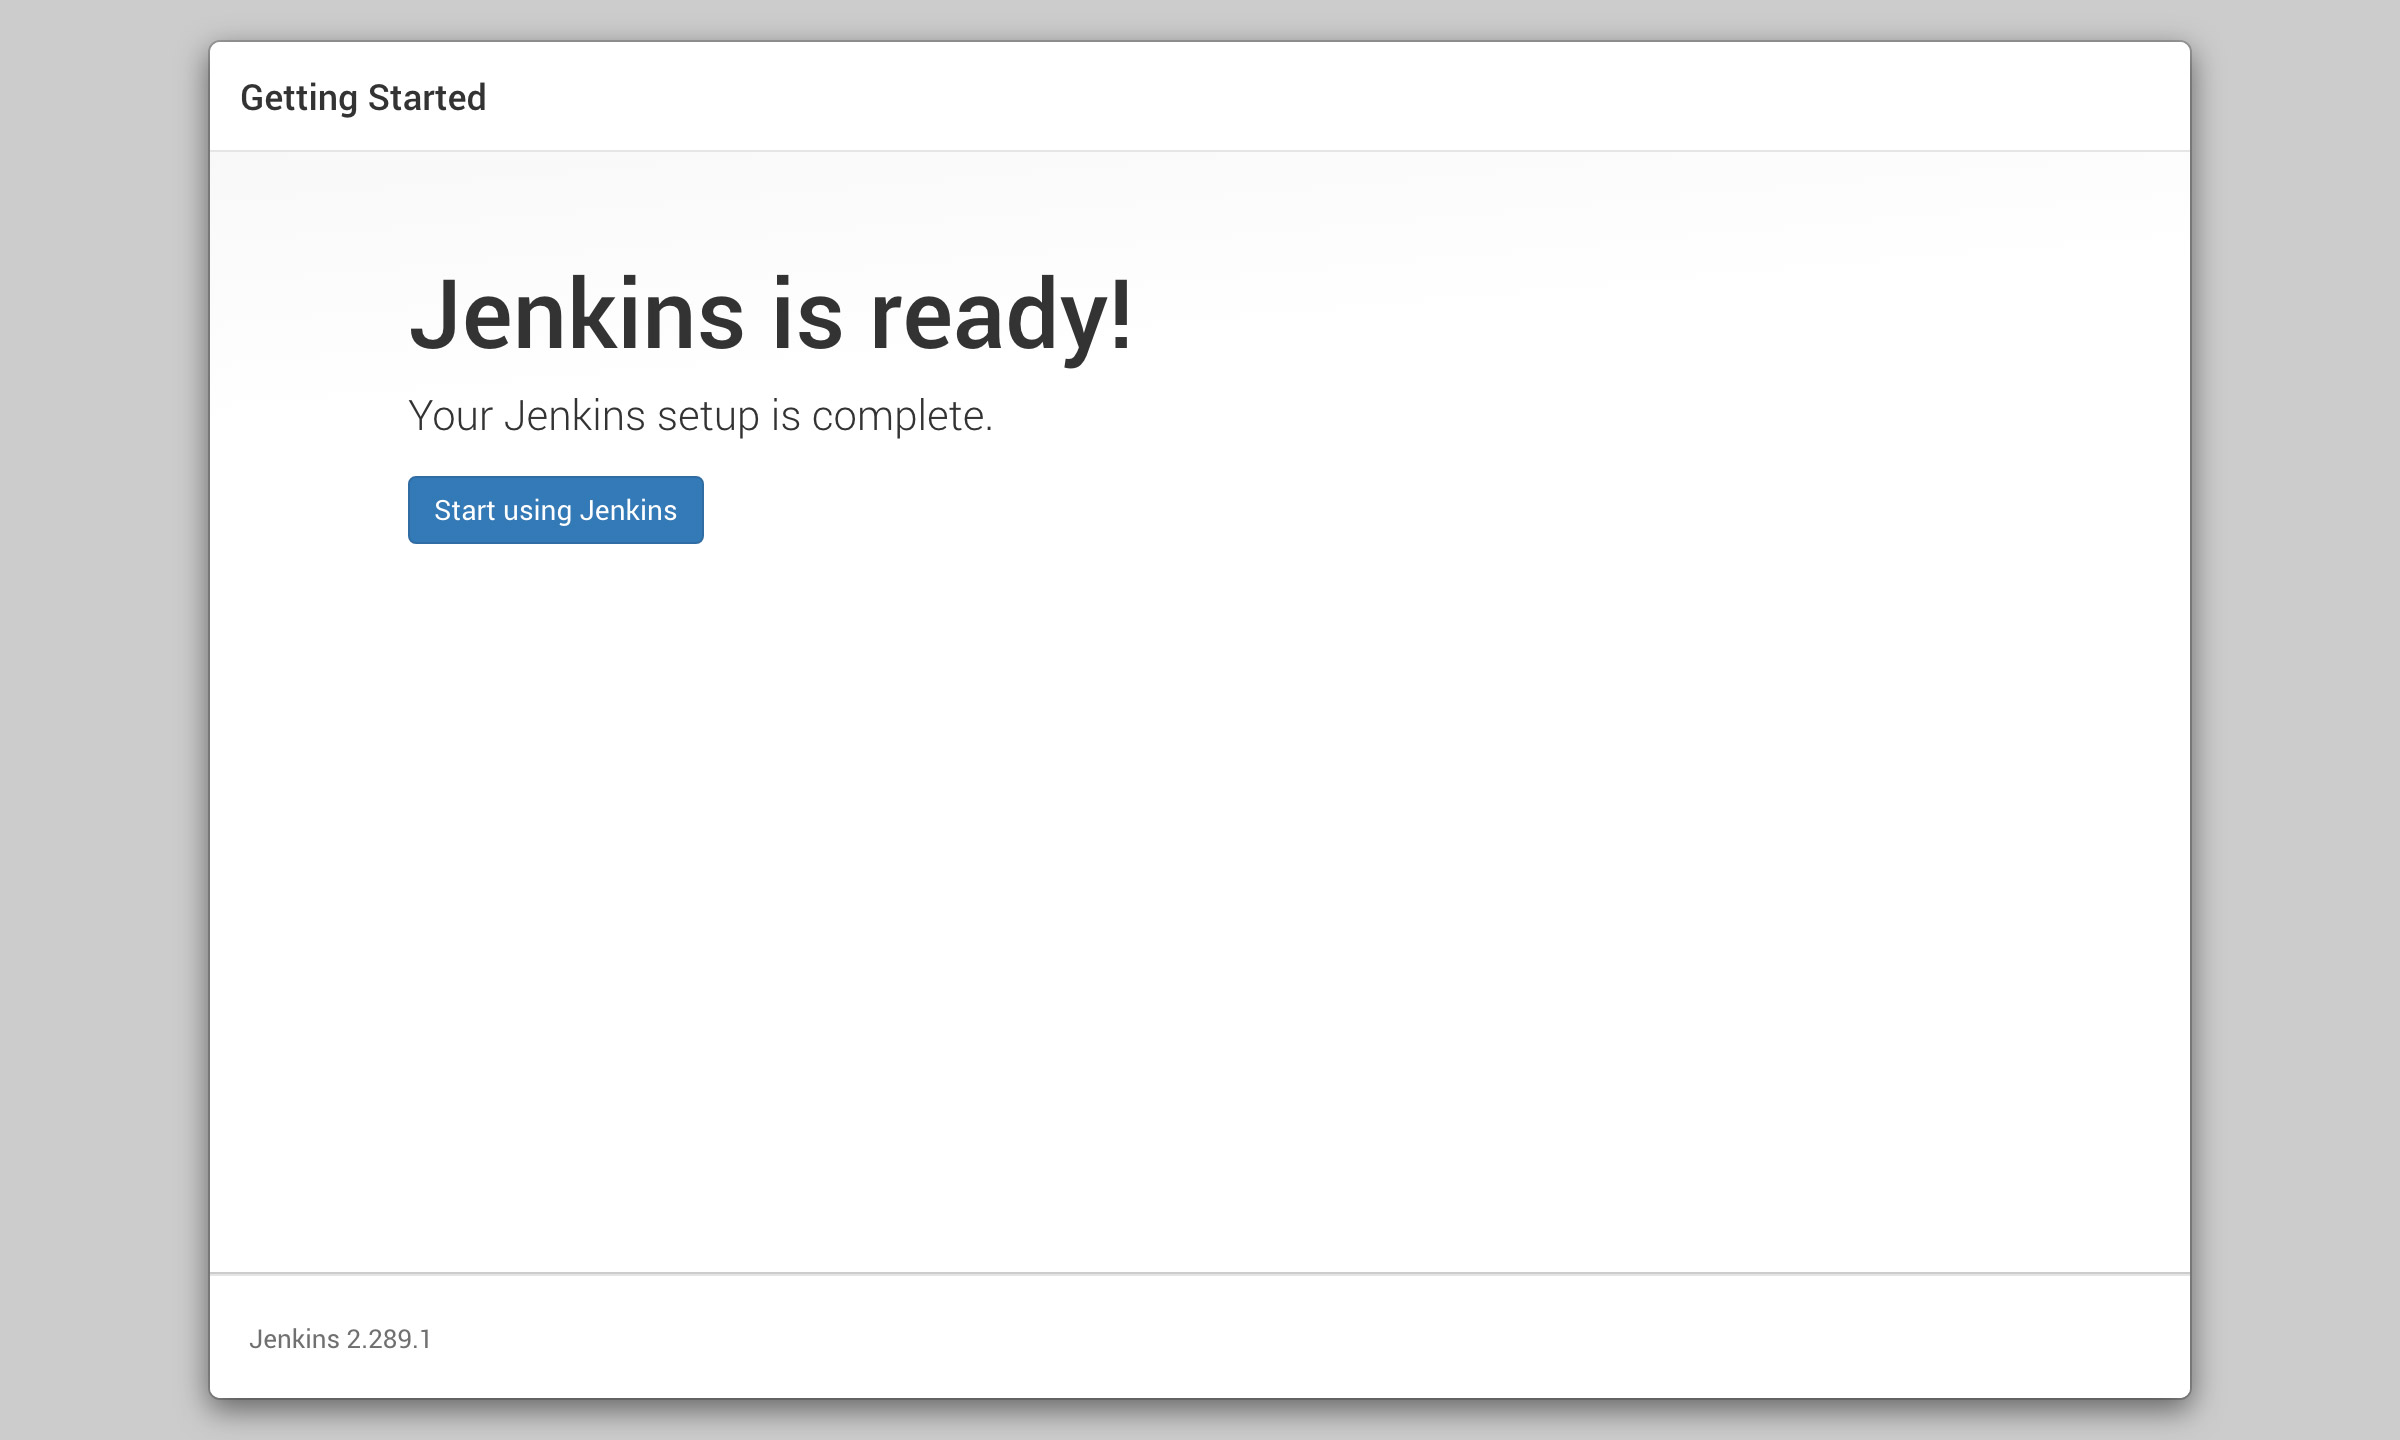
Go to http://<PI_IP>:8080 and enter the password from the terminal.
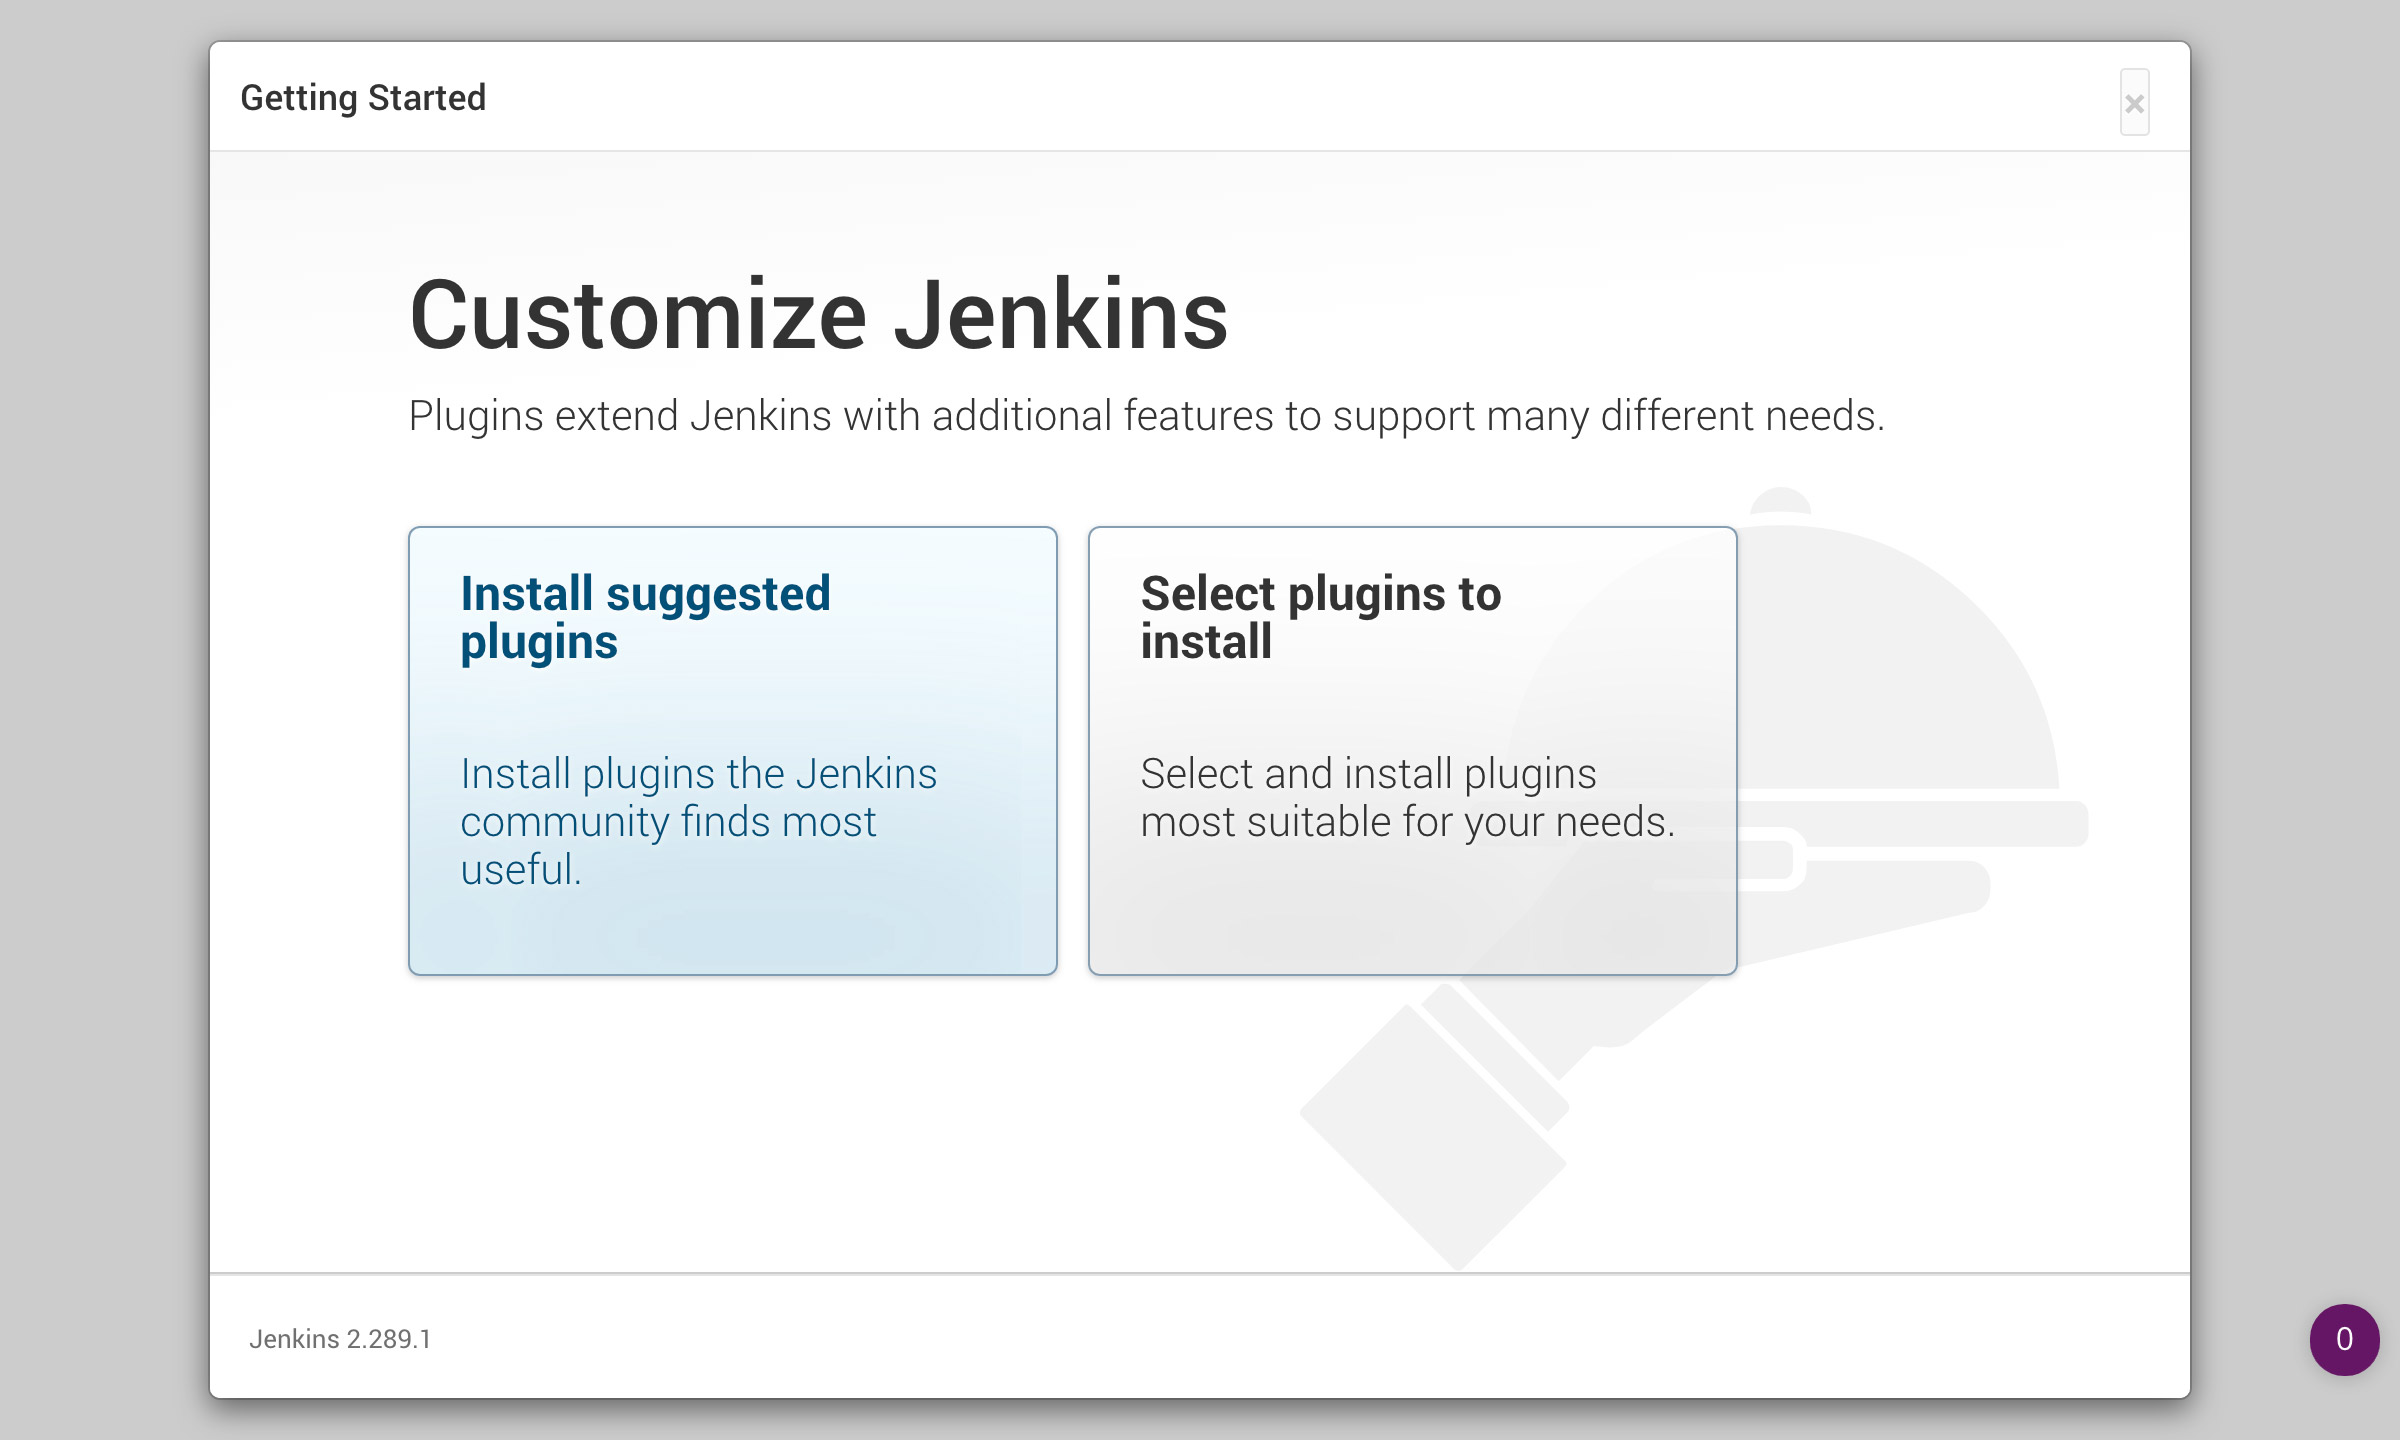
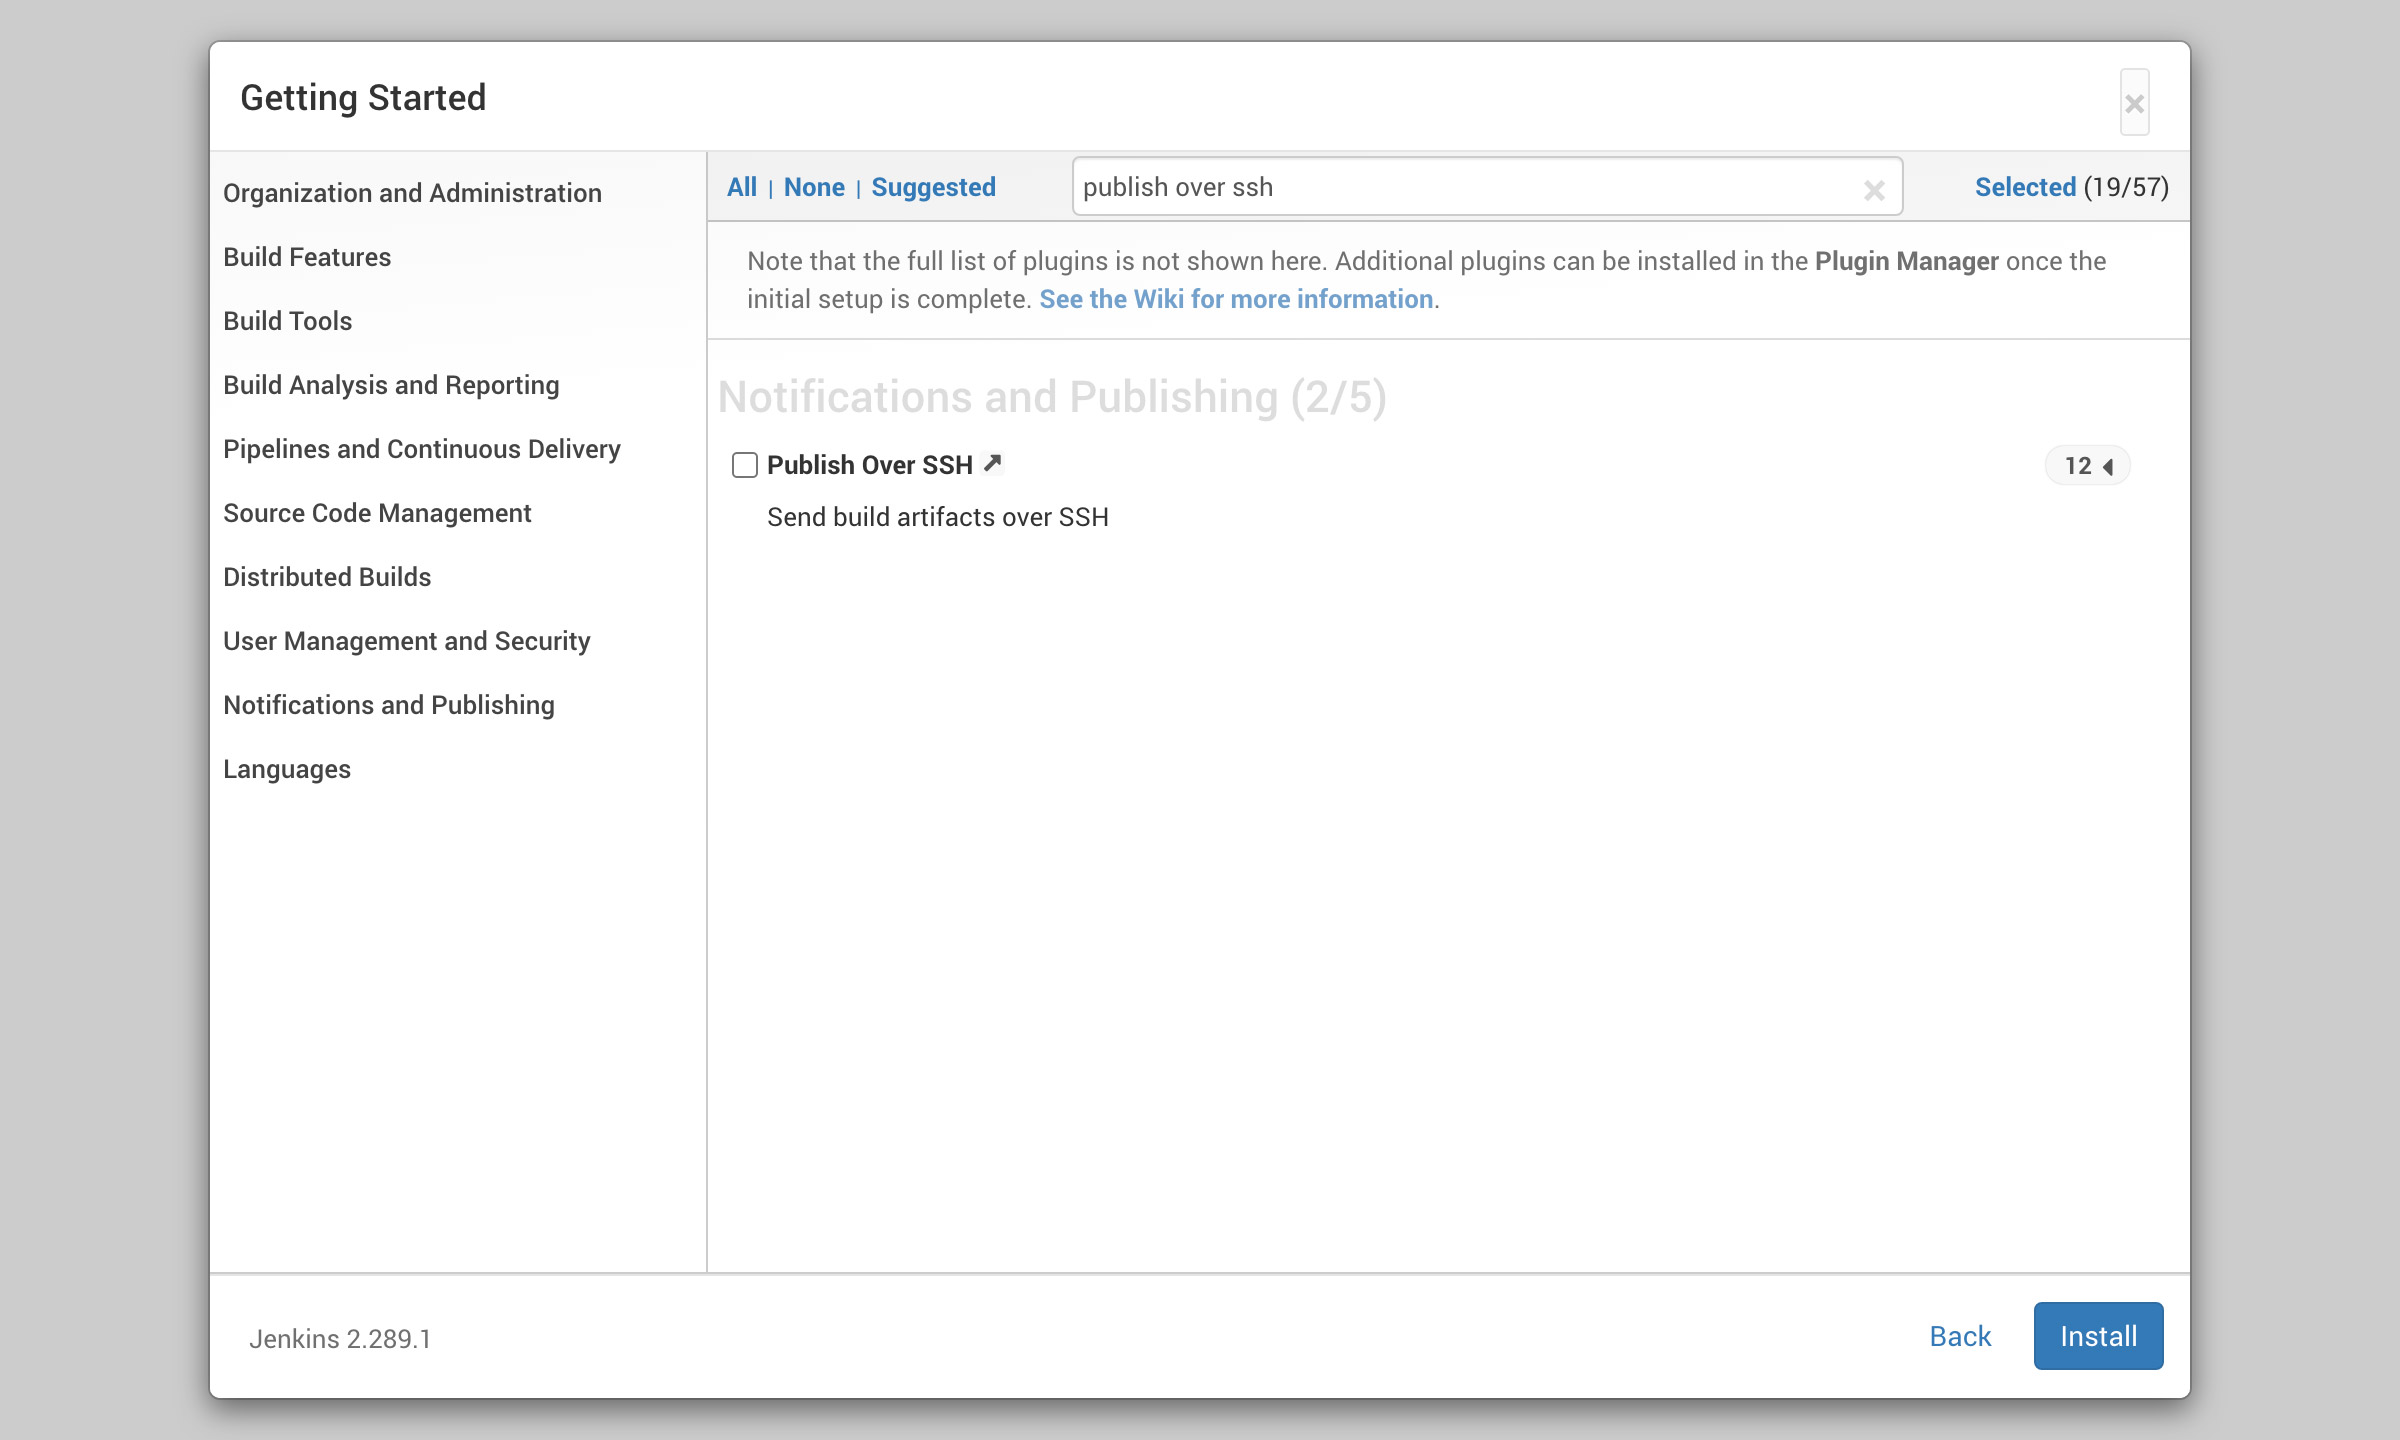
During setup, add the Bitbucket/Github plugin and Publish Over SSH (to transfer files from your repository to your server).
Configuring SSH access to your server
Next, go to Manage Jenkins > Configure System > Publish Over SSH section. If you missed some plugins to add before, you can do it in the Manage Jenkins > Manage Plugins section.
You can either choose to access your server with username/password or with an SSH key.
Method 1: Access via username/password
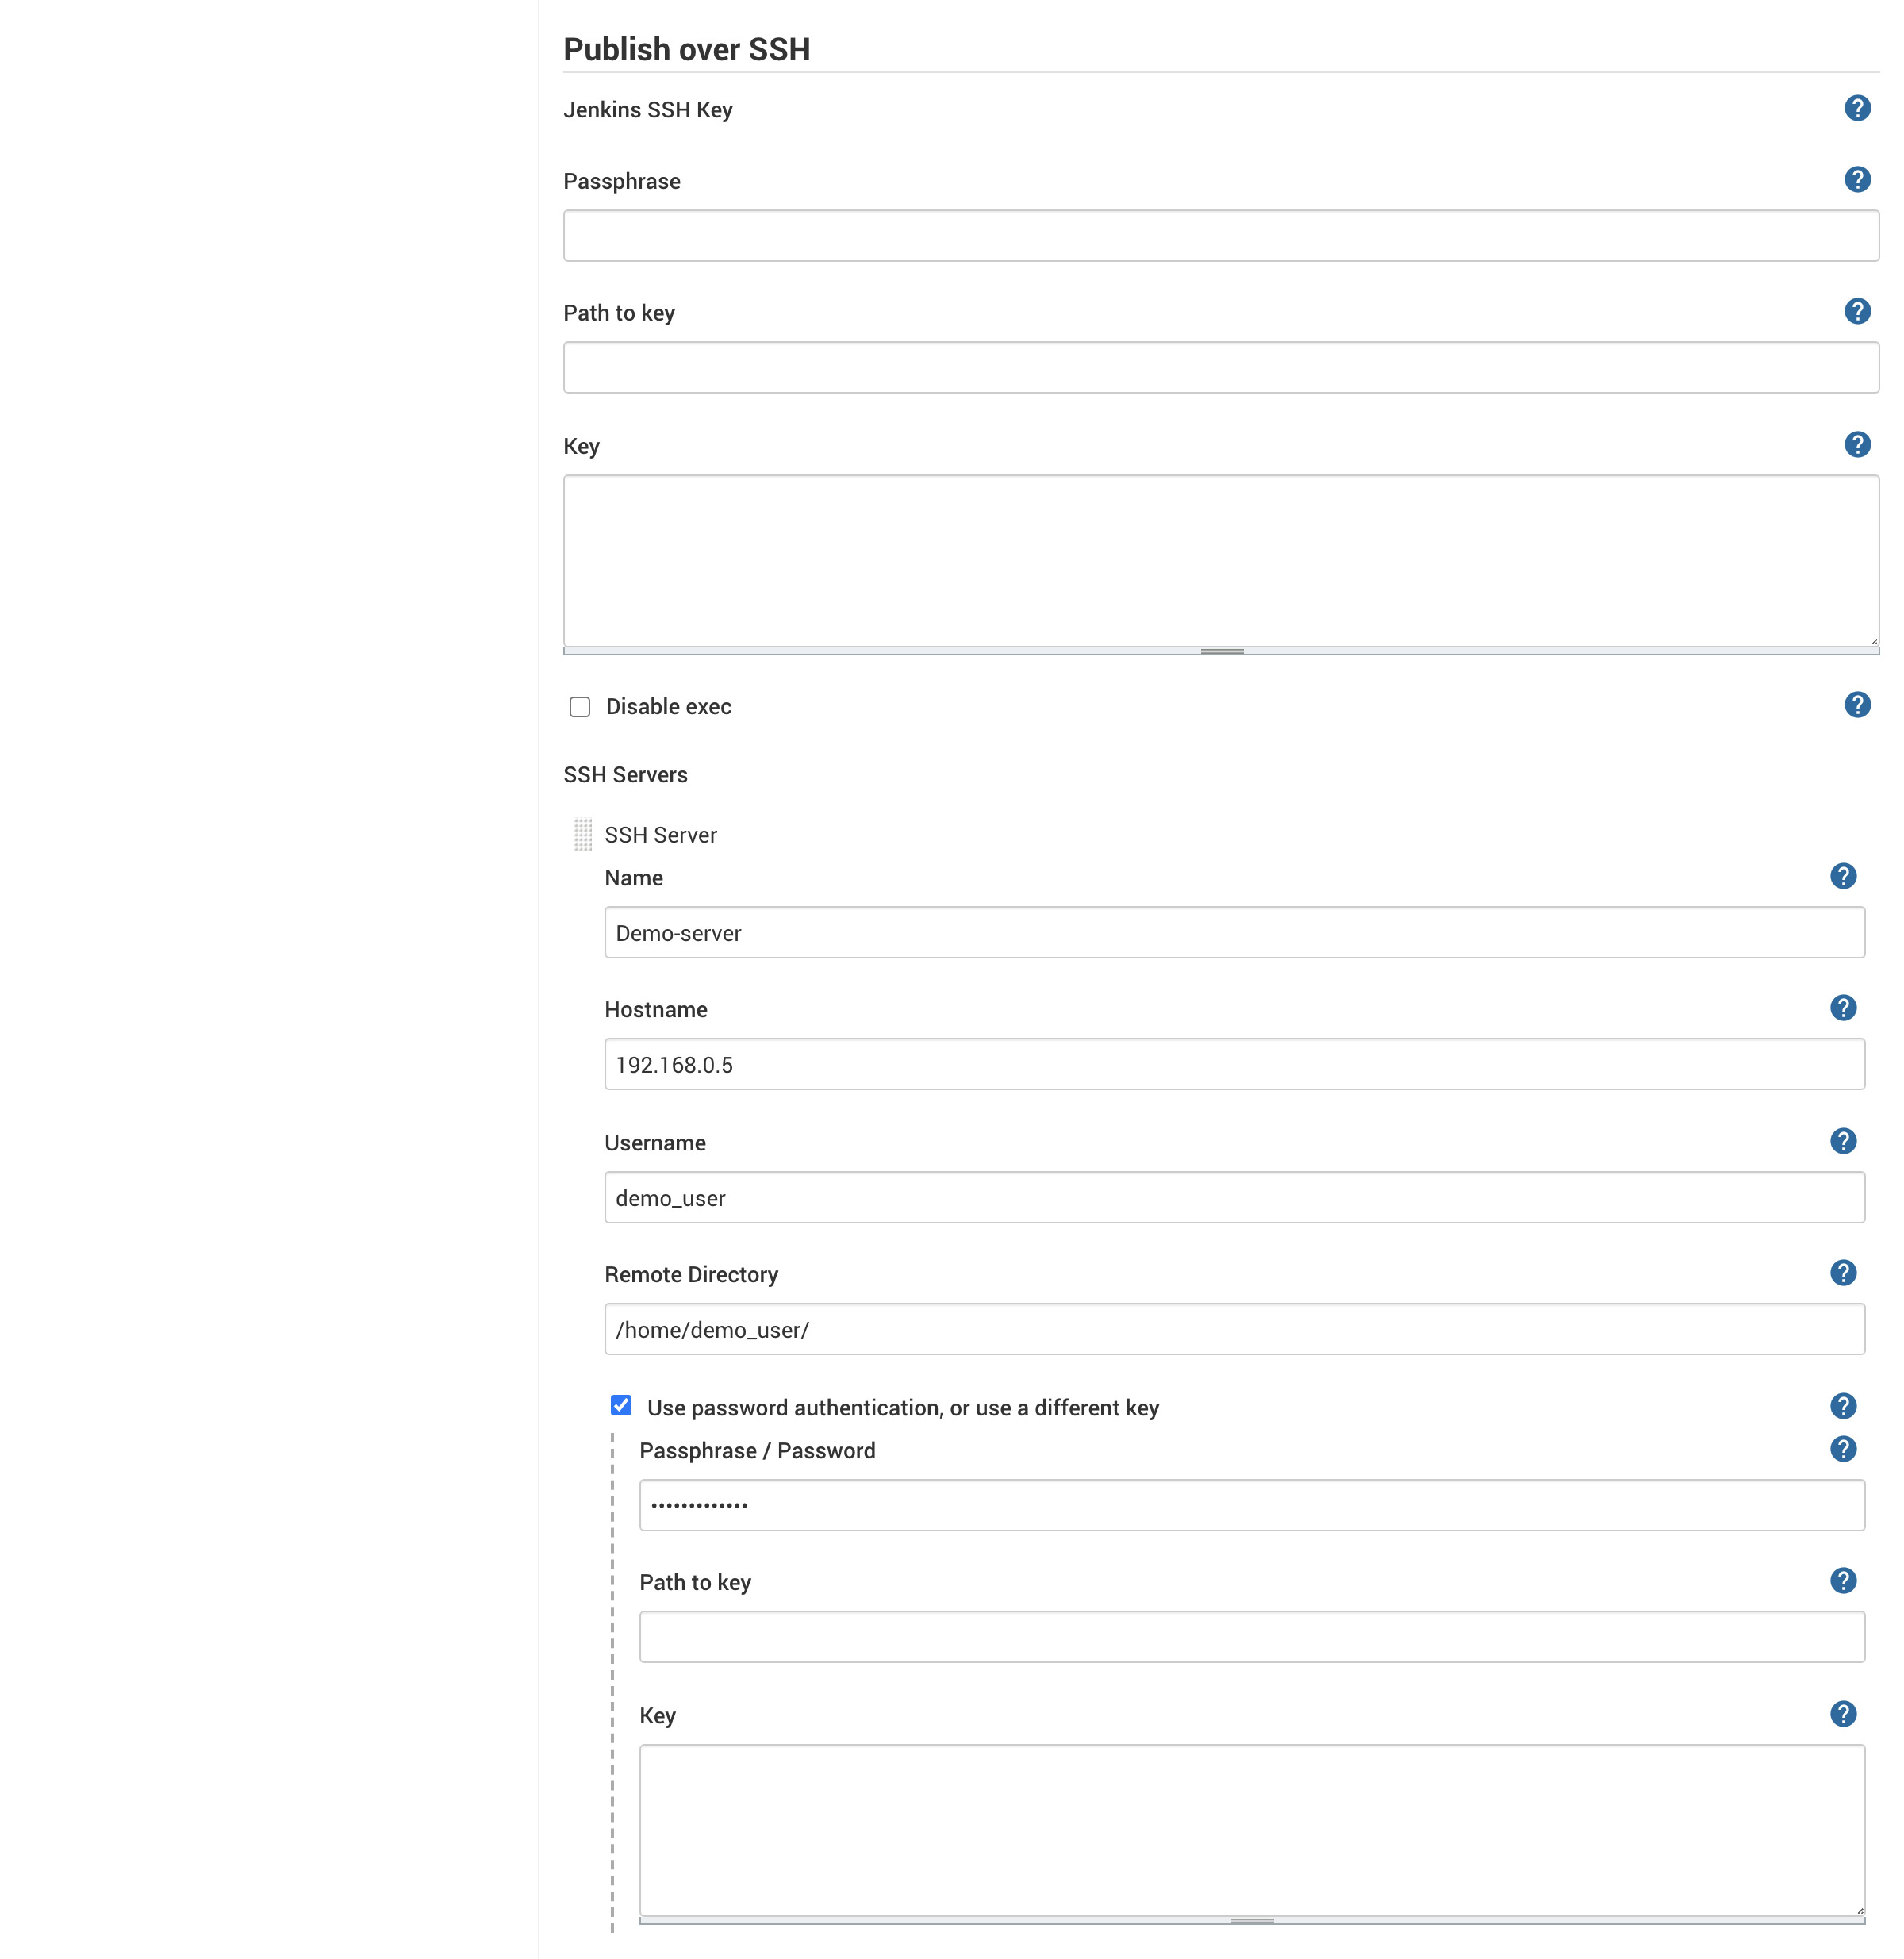
Simply enter:
- A name to identify your server
- The server hostname
- The username used to log in
- The remote directory that will be used as root for further configurations (when creating a job, you can specify a path that will start from here)
- In "Advanced", tick "Use password authentication, or use a different key"
- The password for this user
- Click the "Test configuration" below to ensure the connection works fine
- Click "Save"
Method 2: Access via SSH key
You must first create an SSH key inside the running Docker container. In the terminal, get the container id (`docker ps` will give it to you), then:
docker exec -t <CONTAINER_ID> /bin/bash

# You're now inside the container
root:/#

# You can not run some commands as root, so create a new user:
adduser <USER_NAME>

# Add it to the sudoer group
sudo usermod -aG sudo <USER_NAME>

# Log as this user
su <USER_NAME>

# Create a new SSH key:
ssh-keygen -t rsa

# Launch the SSH agent:
eval `ssh-agent`

# Add a key:
ssh-add <KEY_NAME (for ex: id_rsa)>

# Run the command given by the Jenkins error message to add this to the known_hosts file:
sudo apt-get update && sudo apt-get upgrade
sudo apt-get install git
git ls-remote -h ... HEAD
Accessing Bitbucket
Add Bitbucket credentials to Jenkins
Go to Manage Jenkins > Manage Credentials and select the Jenkins store > Global credentials (unrestricted) > Add Credentials. You can use multiple ways to access your Bitbucket account from Jenkins (including an SSH key), but for this example, we'll use the username and password.
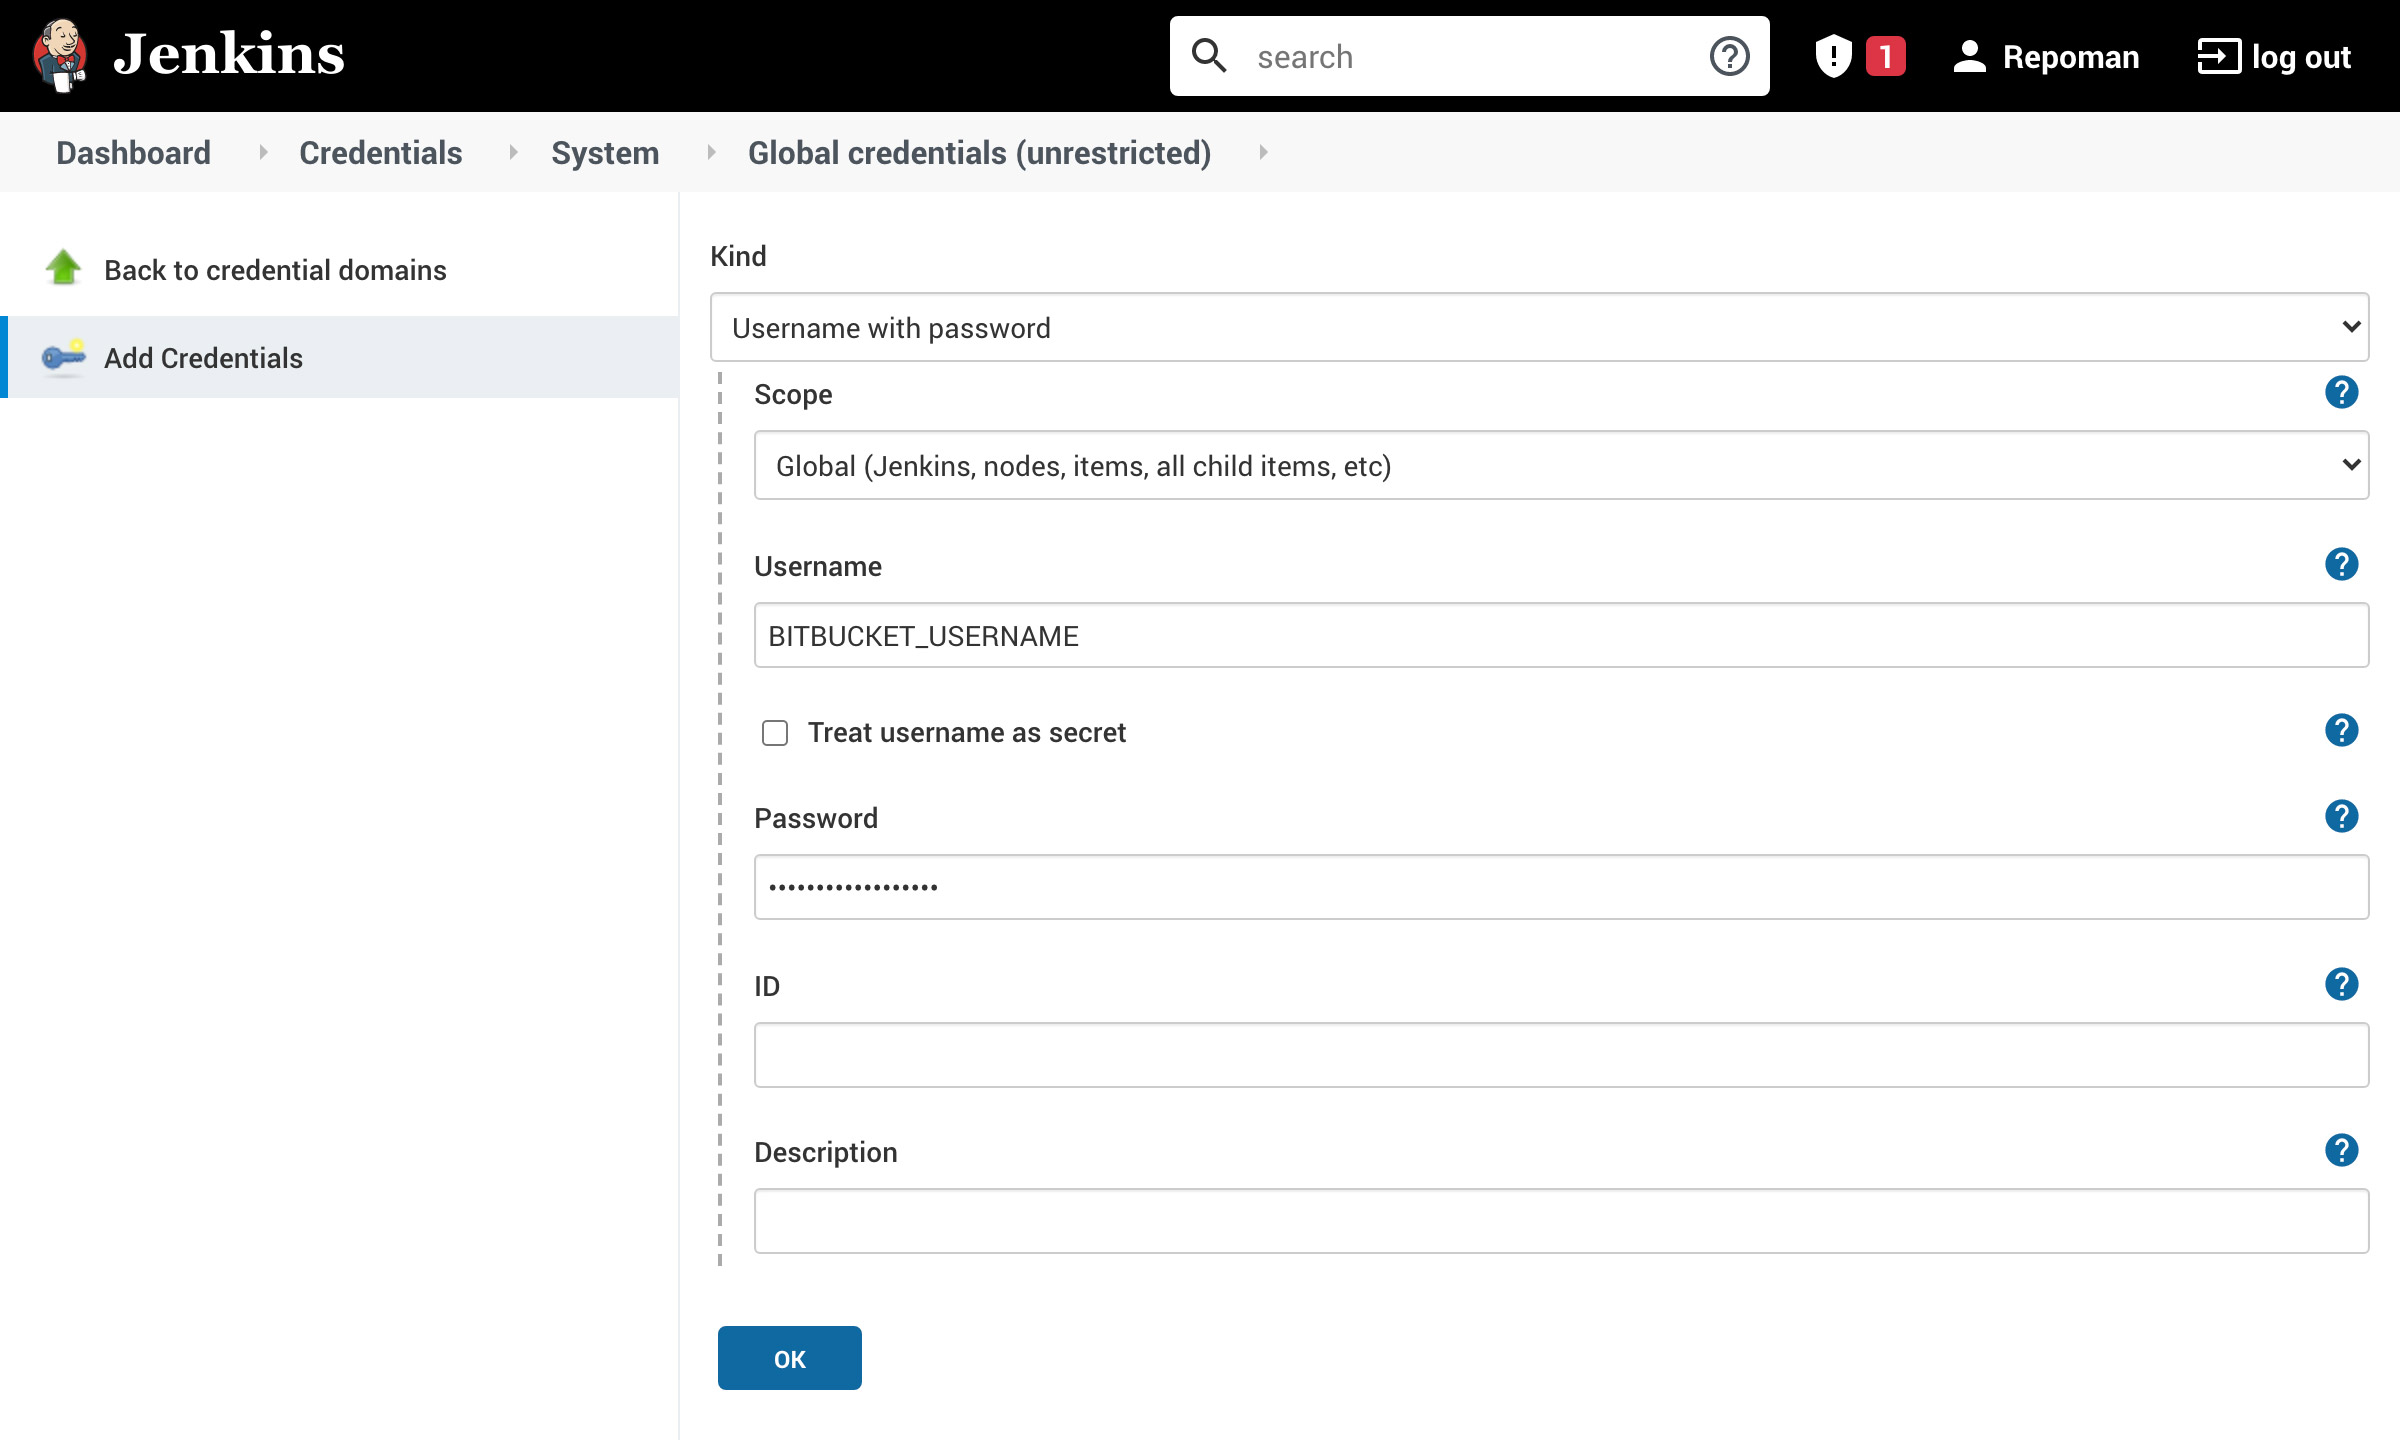
- Select "Username with password"
- Enter your Bitbucket username
- Enter your Bitbucket password
- Enter an ID to help identify these credentials
- Click "OK"
Expose Jenkins port in your router
Expose the Jenkins port in your router's settings so Bitbucket can communicate with it. This is not good practice for security reasons though (TODO: expand this section).
Create a webhook in Bitbucket
Go to Bitbucket and add a webhook in your repository's settings: Repository settings > Webhooks > Add webhook
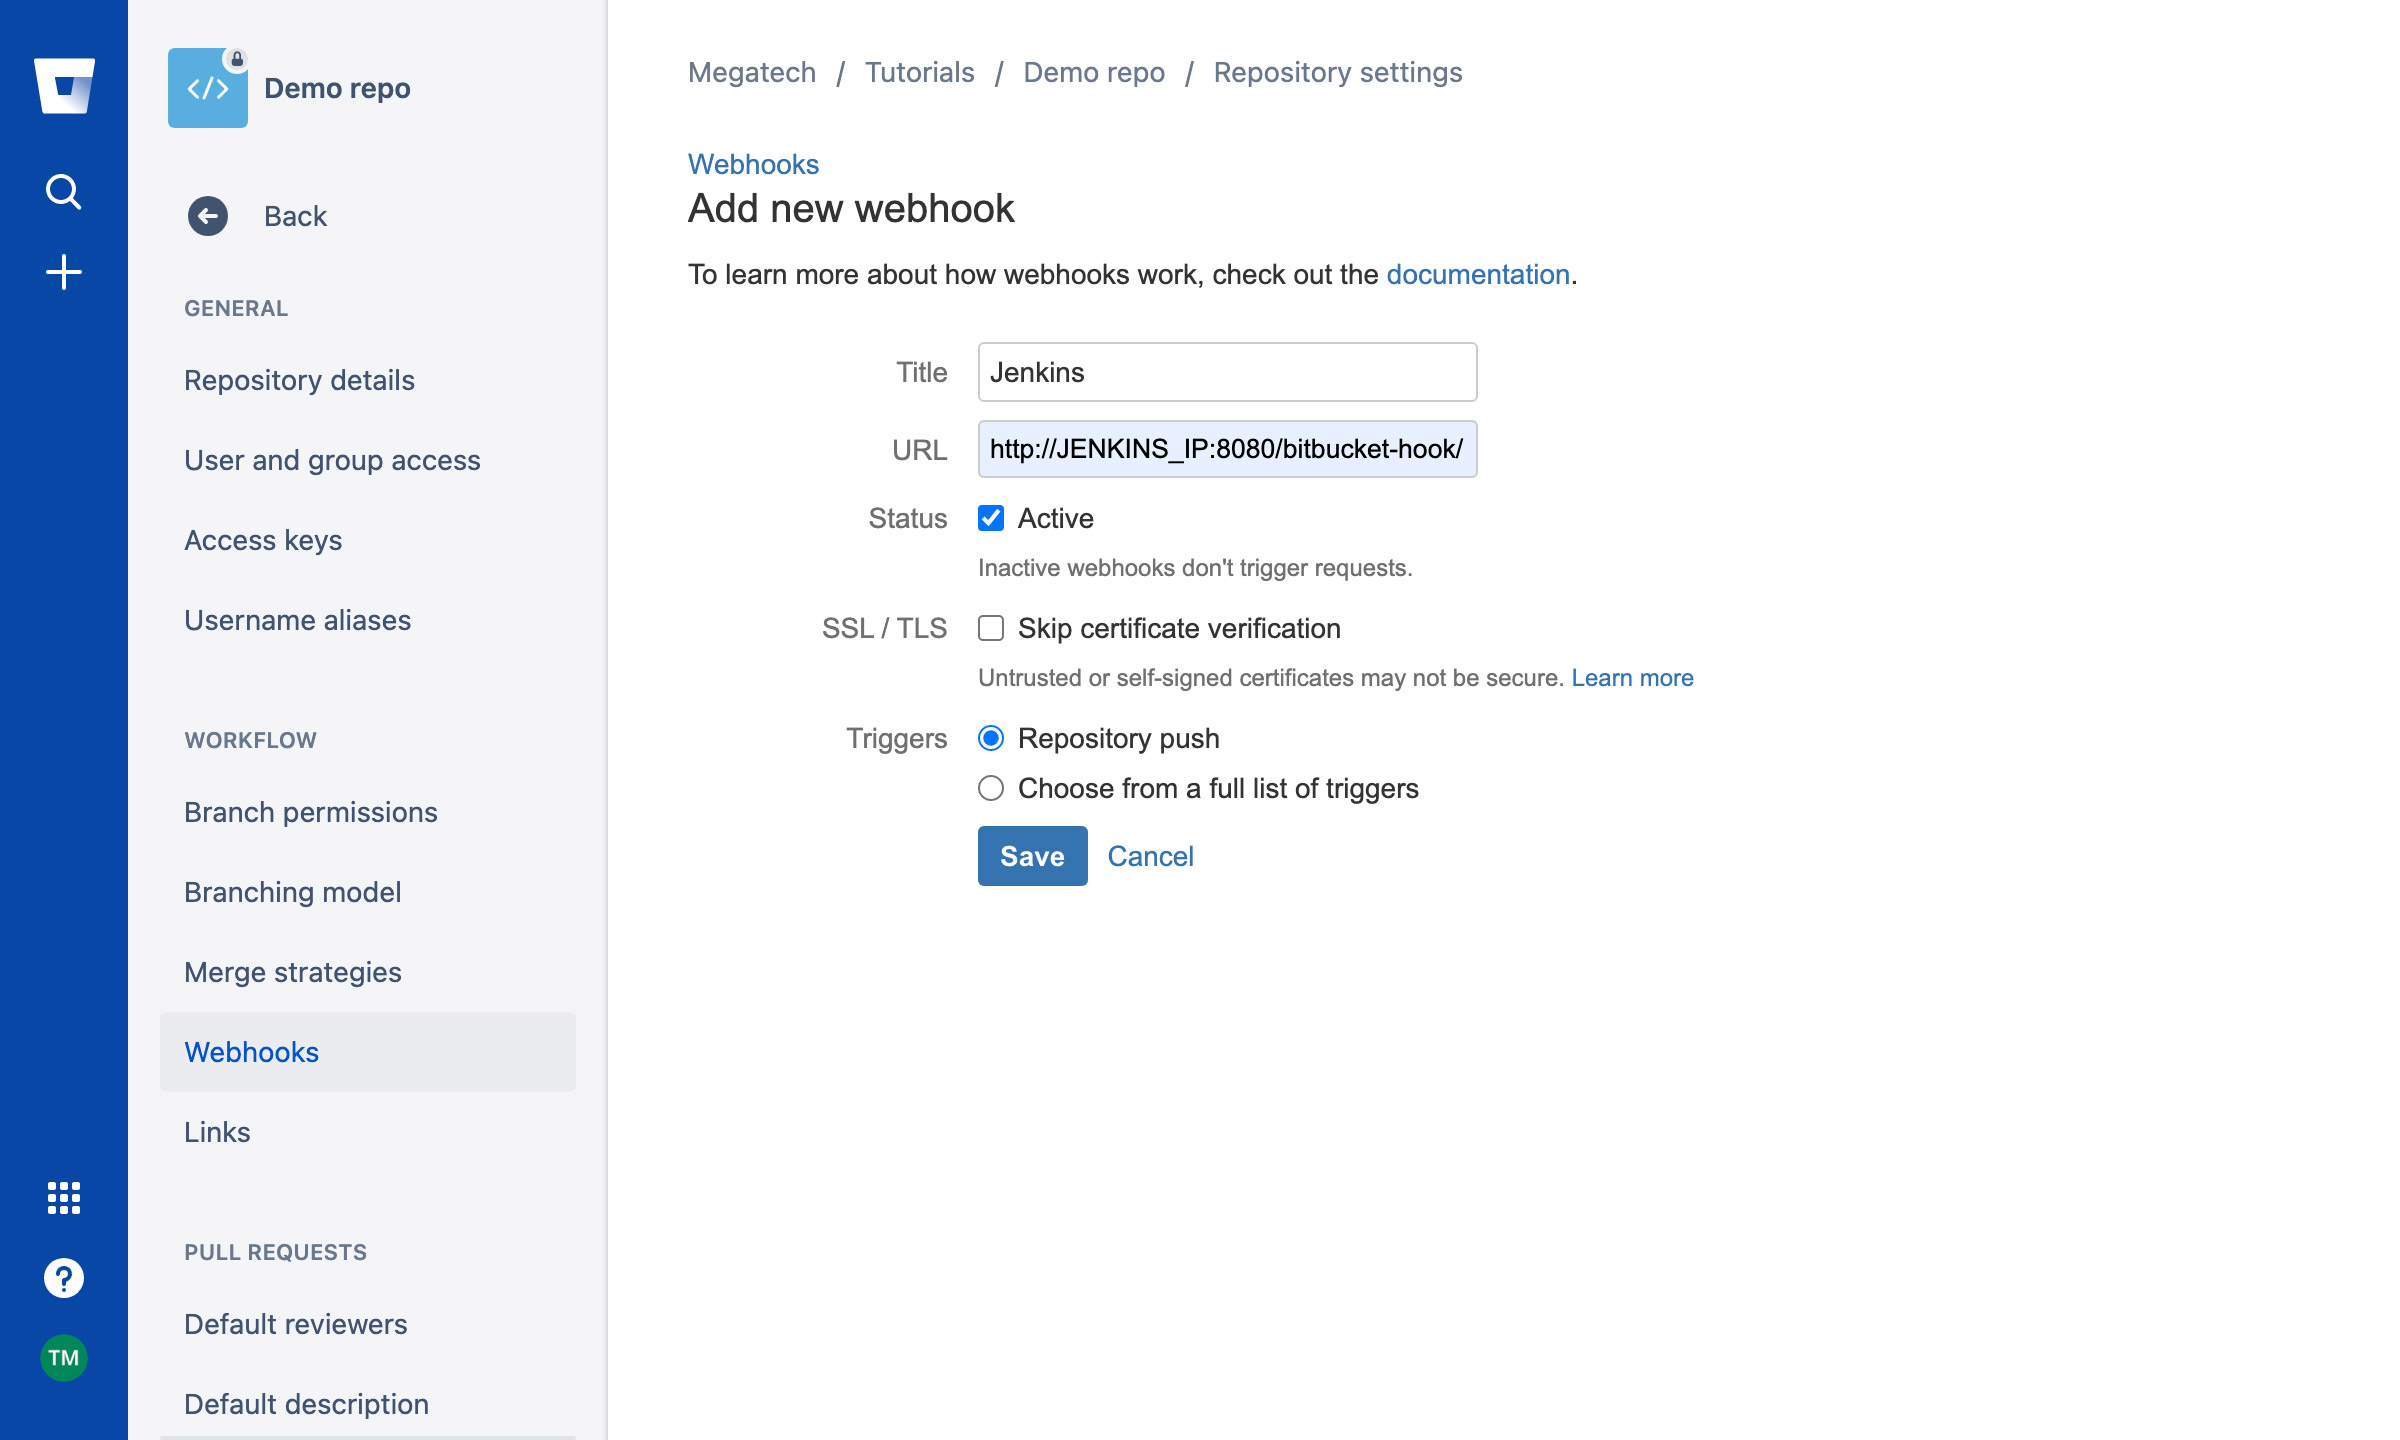
Enter your Jenkins url (don't forget to add "/bitbucket-hook/" to it):
https://YOUR.JENKINS.SERVER:PORT/bitbucket-hook/
Click "Save"
Creating a job
Back in the Jenkins dashboard, you can now create a new job ("New Item").
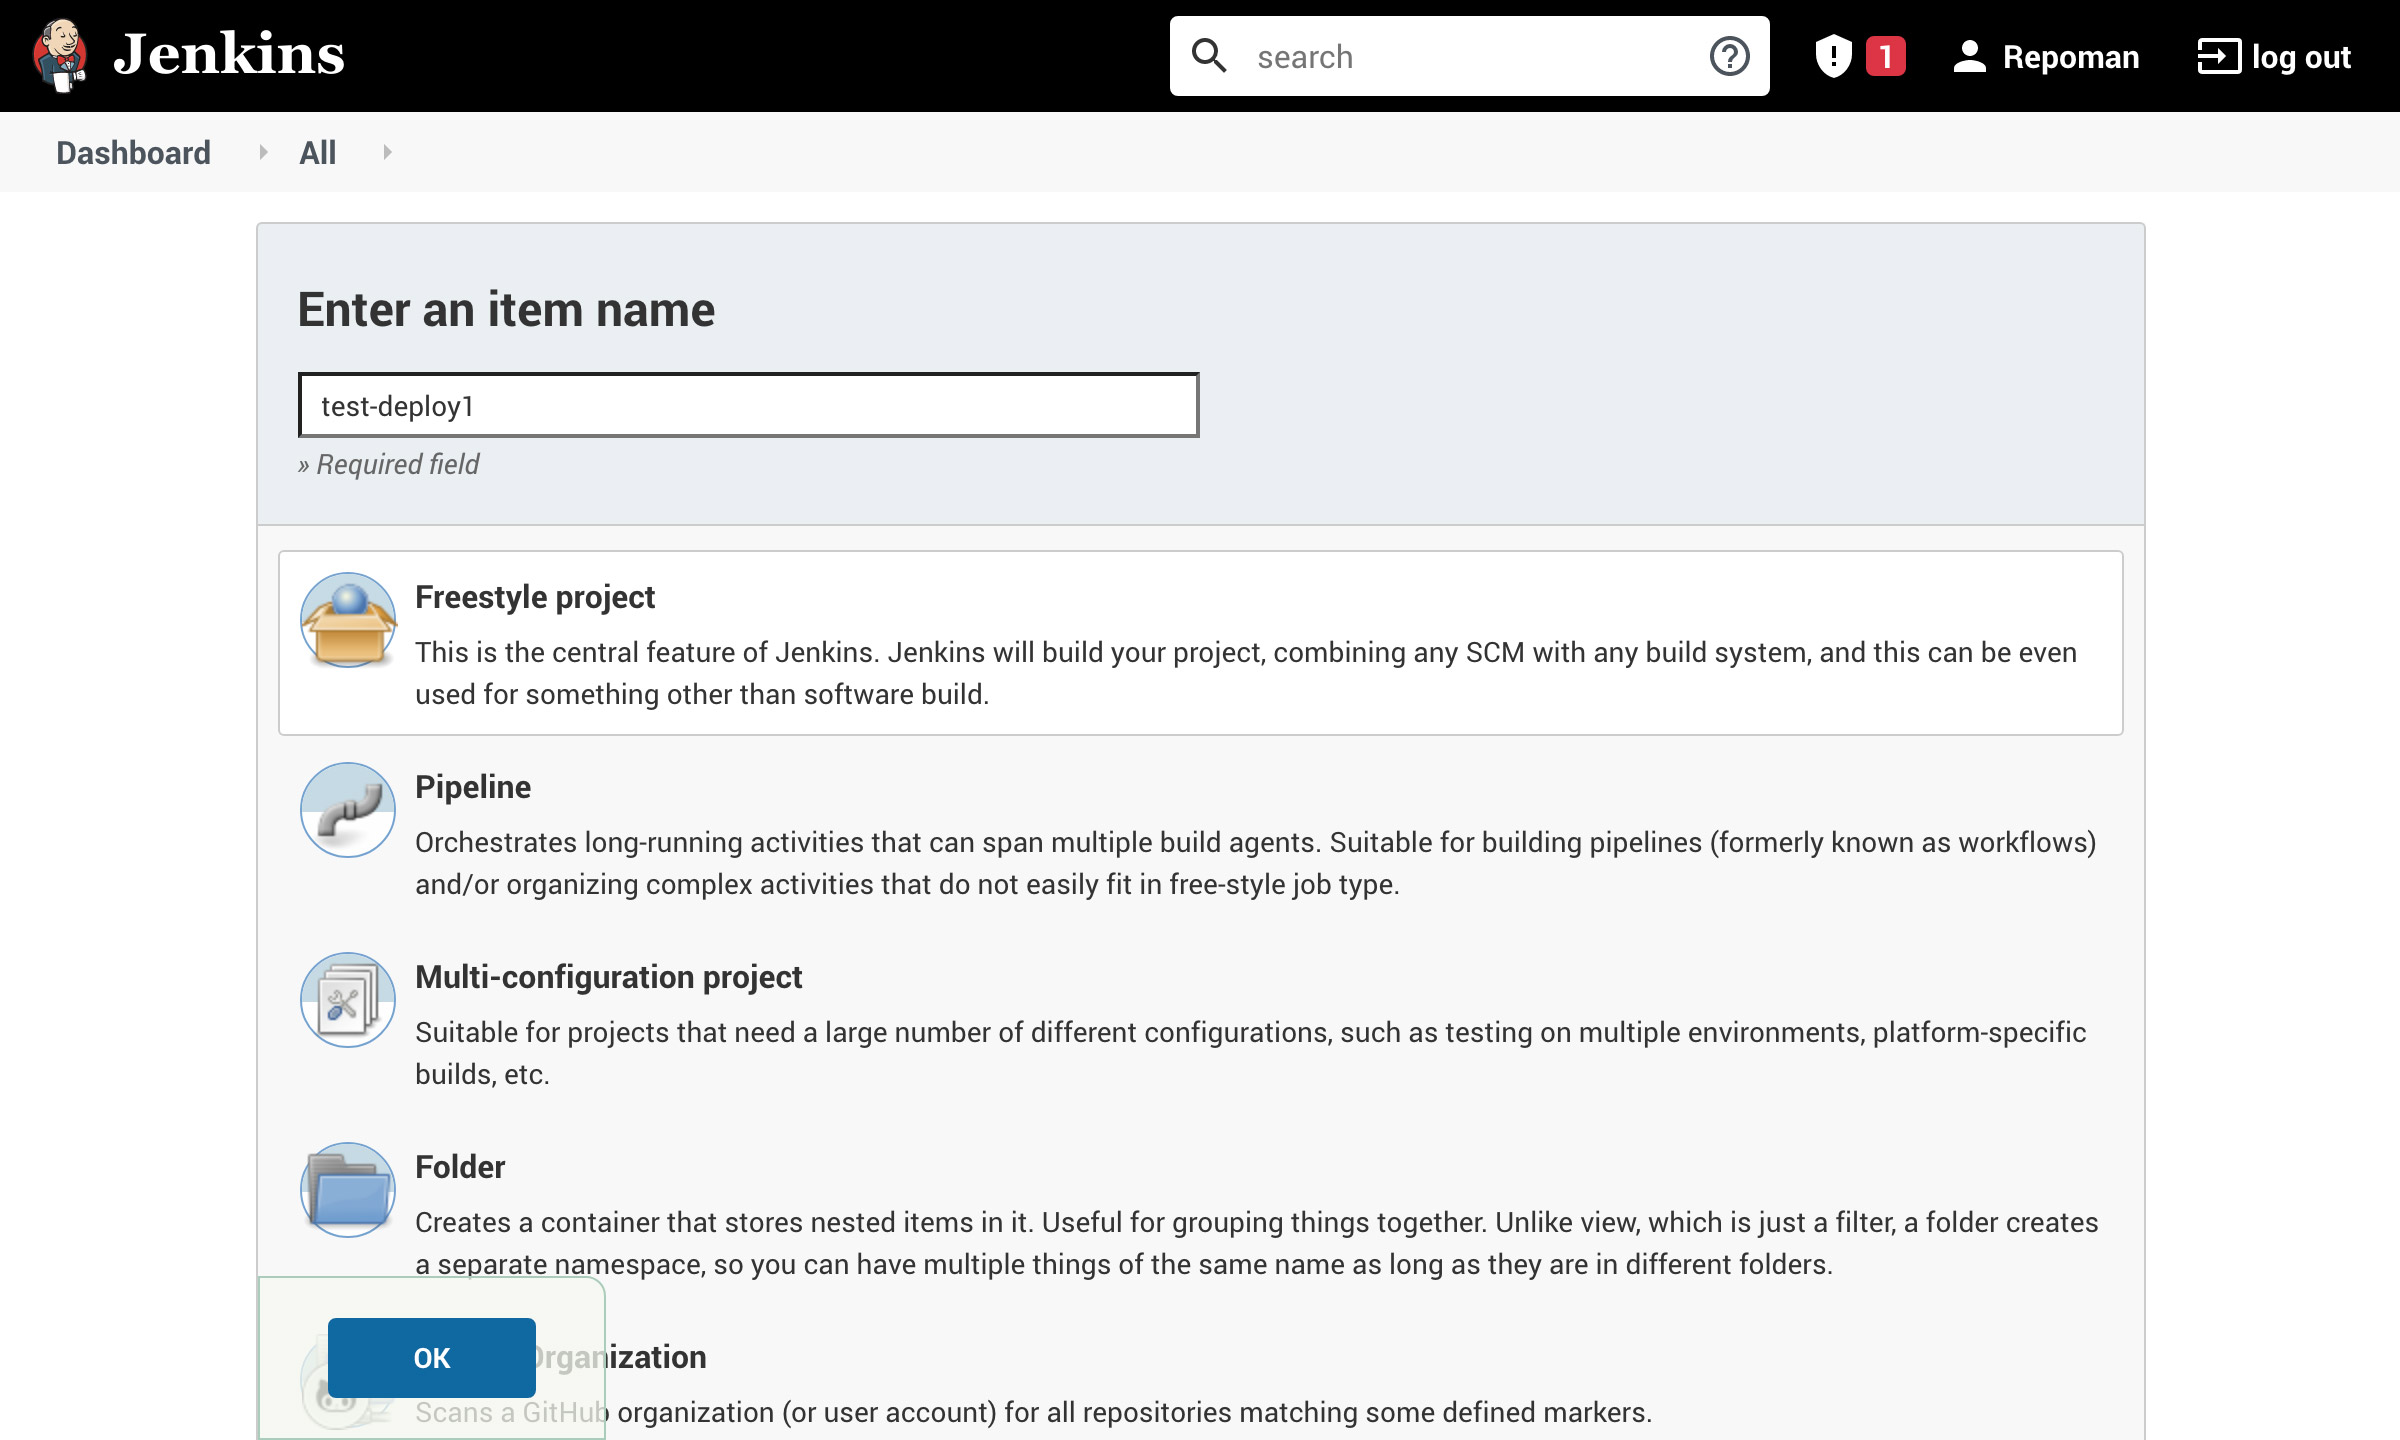
- Enter a name
- Select "Freestyle project"
- Click "OK"
Then, you need to configure these 3 sections:
Source Code Management
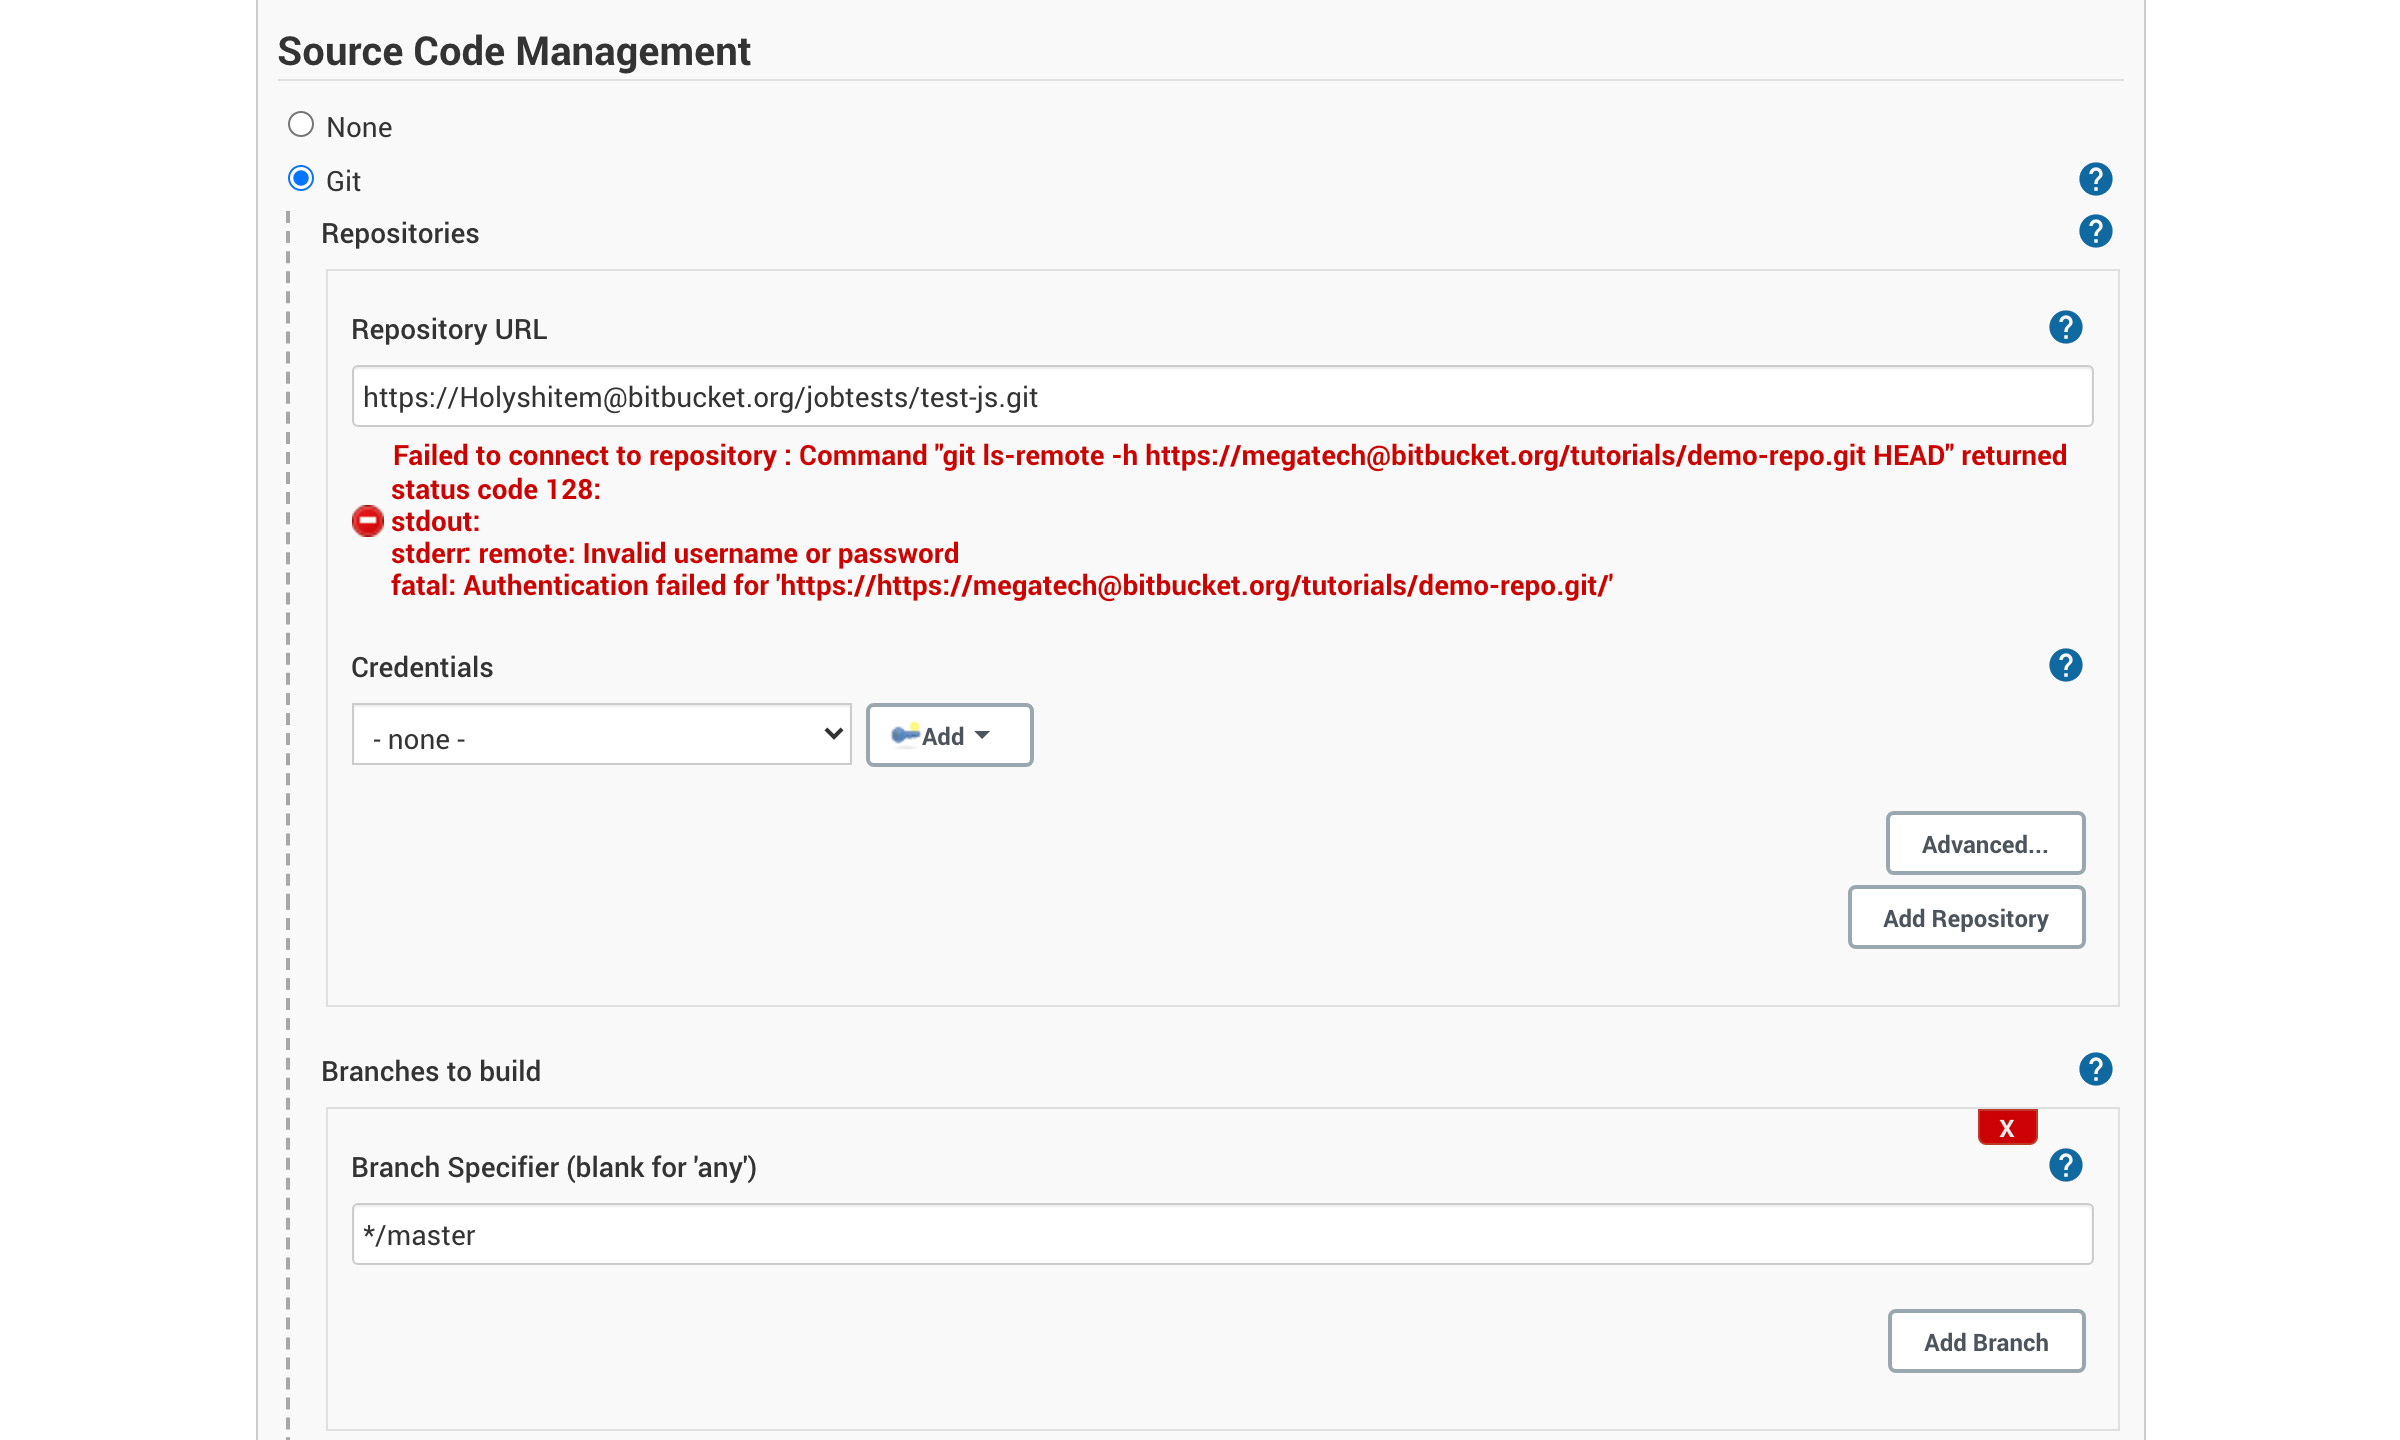
- Select "Git"
- Enter your "Repository URL"
- In "Credentials", select the Bitbucket ones created above
- Select the Git branch on which a commit will trigger the build actions
If you get this kind of message after setting the url + the credentials:
Failed to connect to repository : Command "git ls-remote -h https://xxx@bitbucket.org/xxx.git HEAD" returned status code 128
You then need to add the SSH key fingerprint to the Pi known hosts. To do so:
- Install Git on the Pi: sudo apt-get install git
- Copy & paste the command quoted in the error message into your terminal: "git ls-remote -h https://xxx@bitbucket.org/xxx.git HEAD"
- The system should now ask you if you trust this address, answer "yes"
Build Triggers
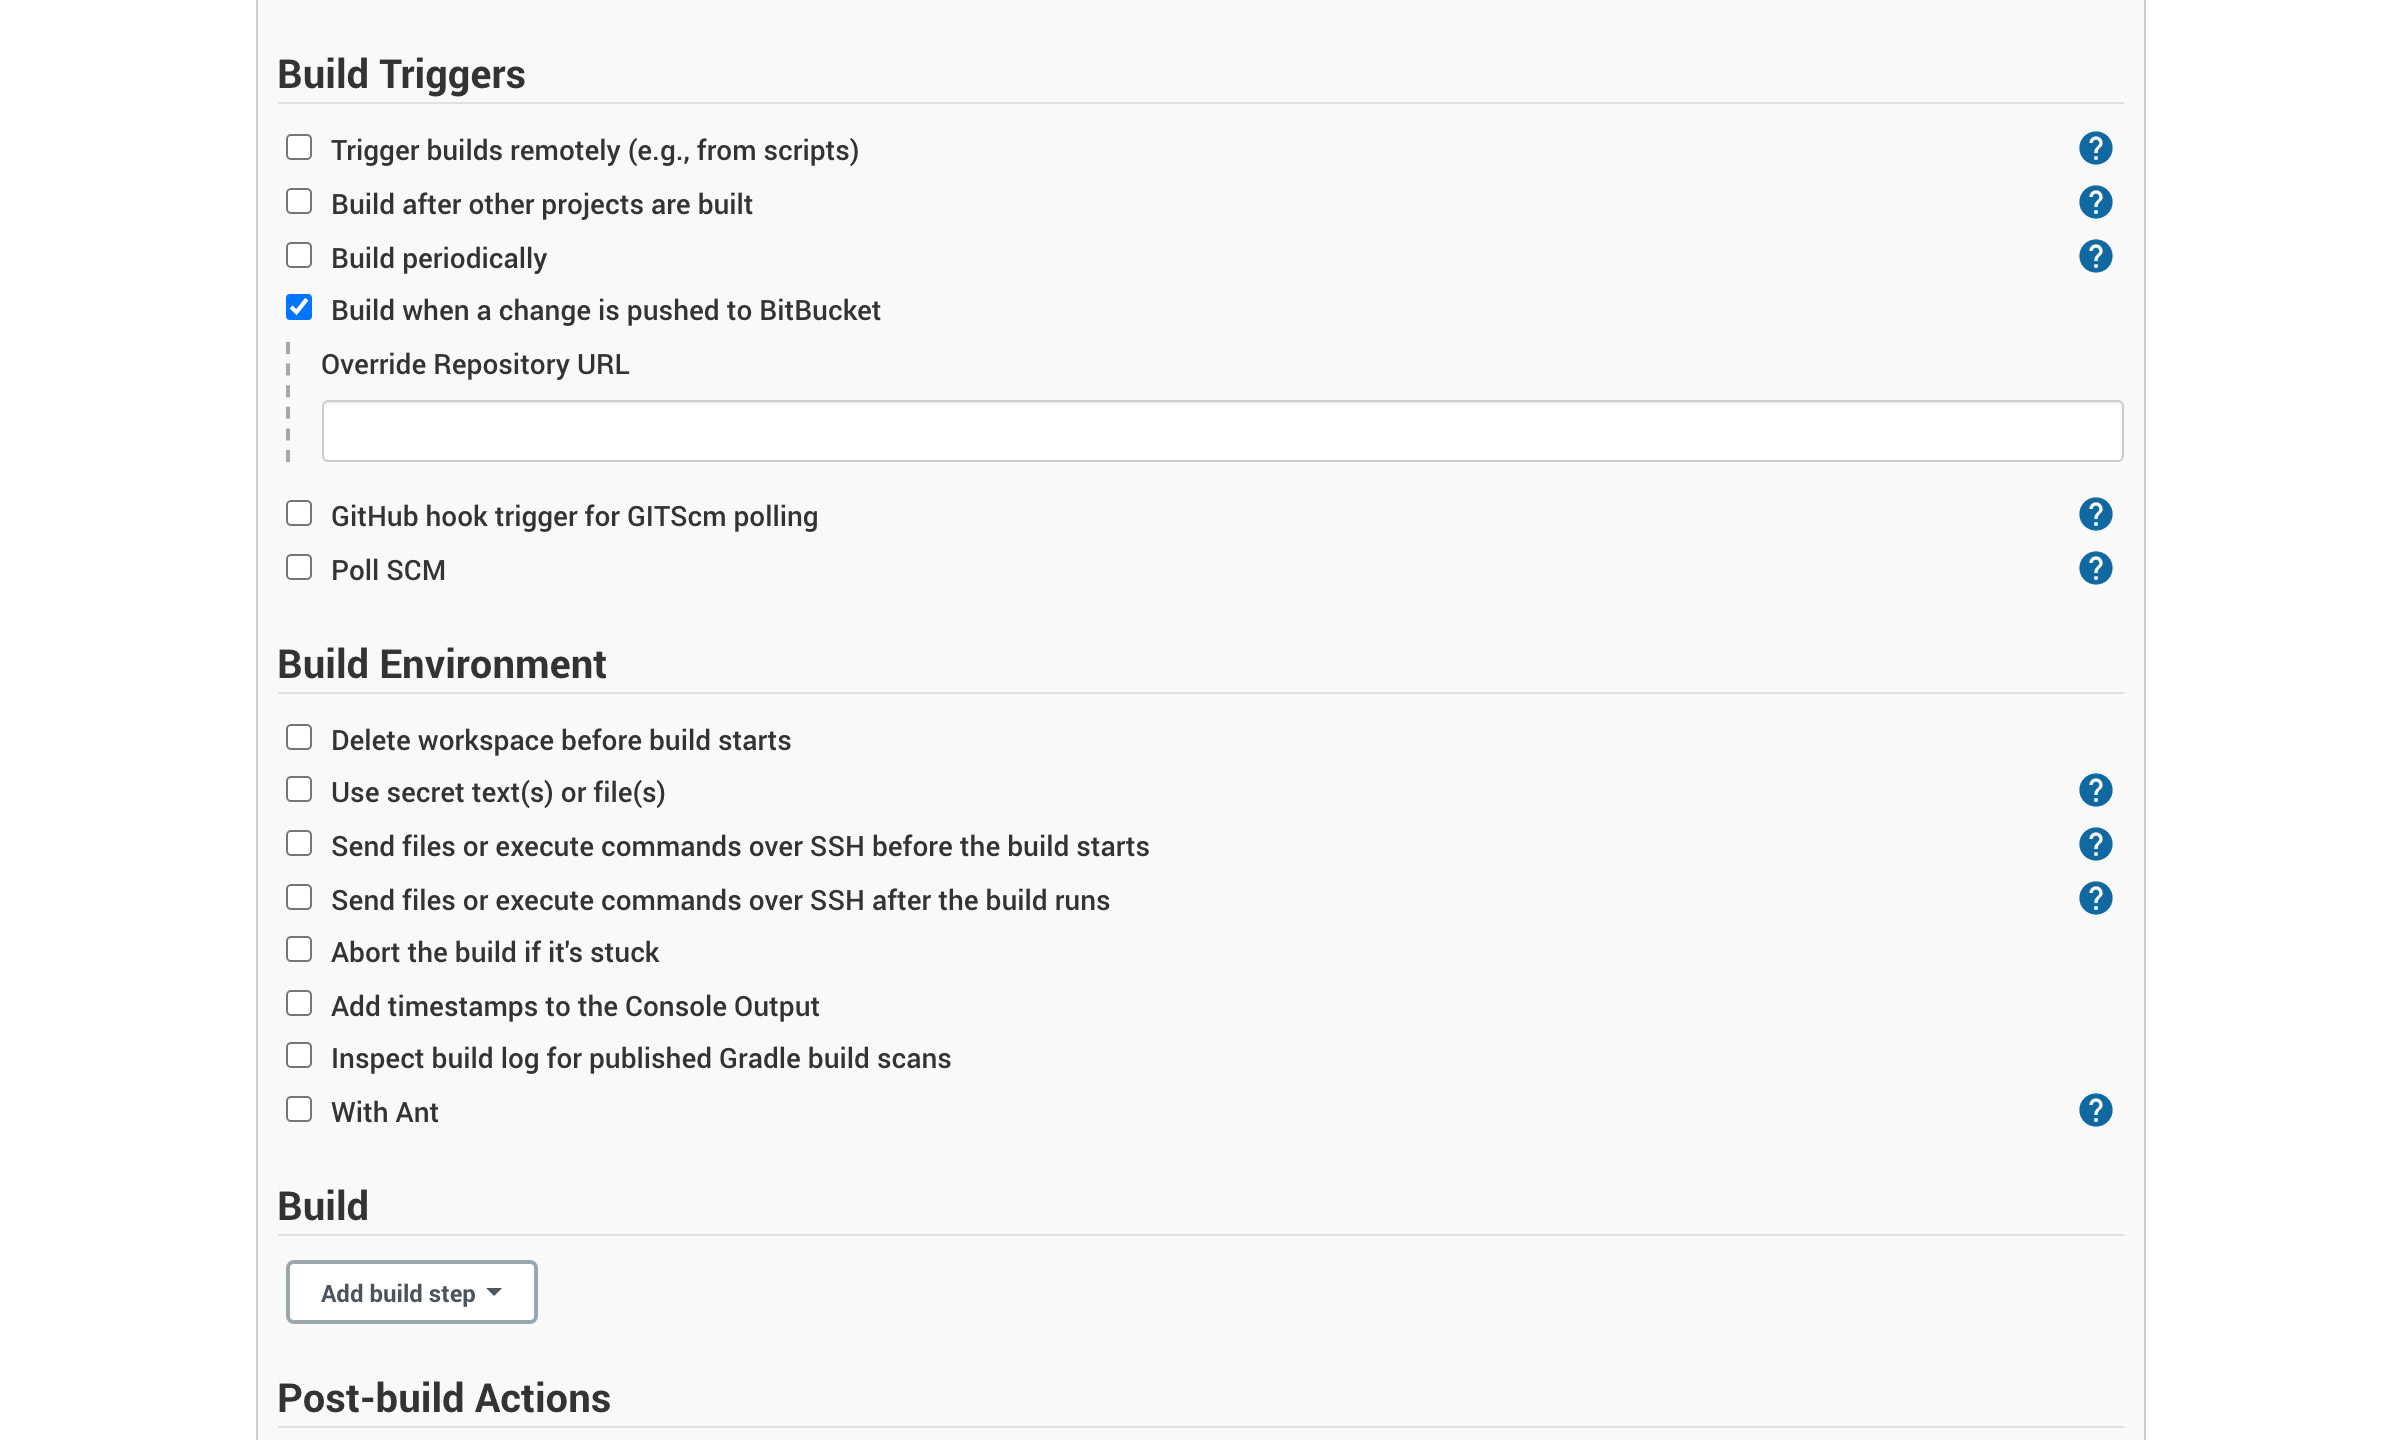
- Select "Build when a change is pushed to BitBucket"
Post-build Actions
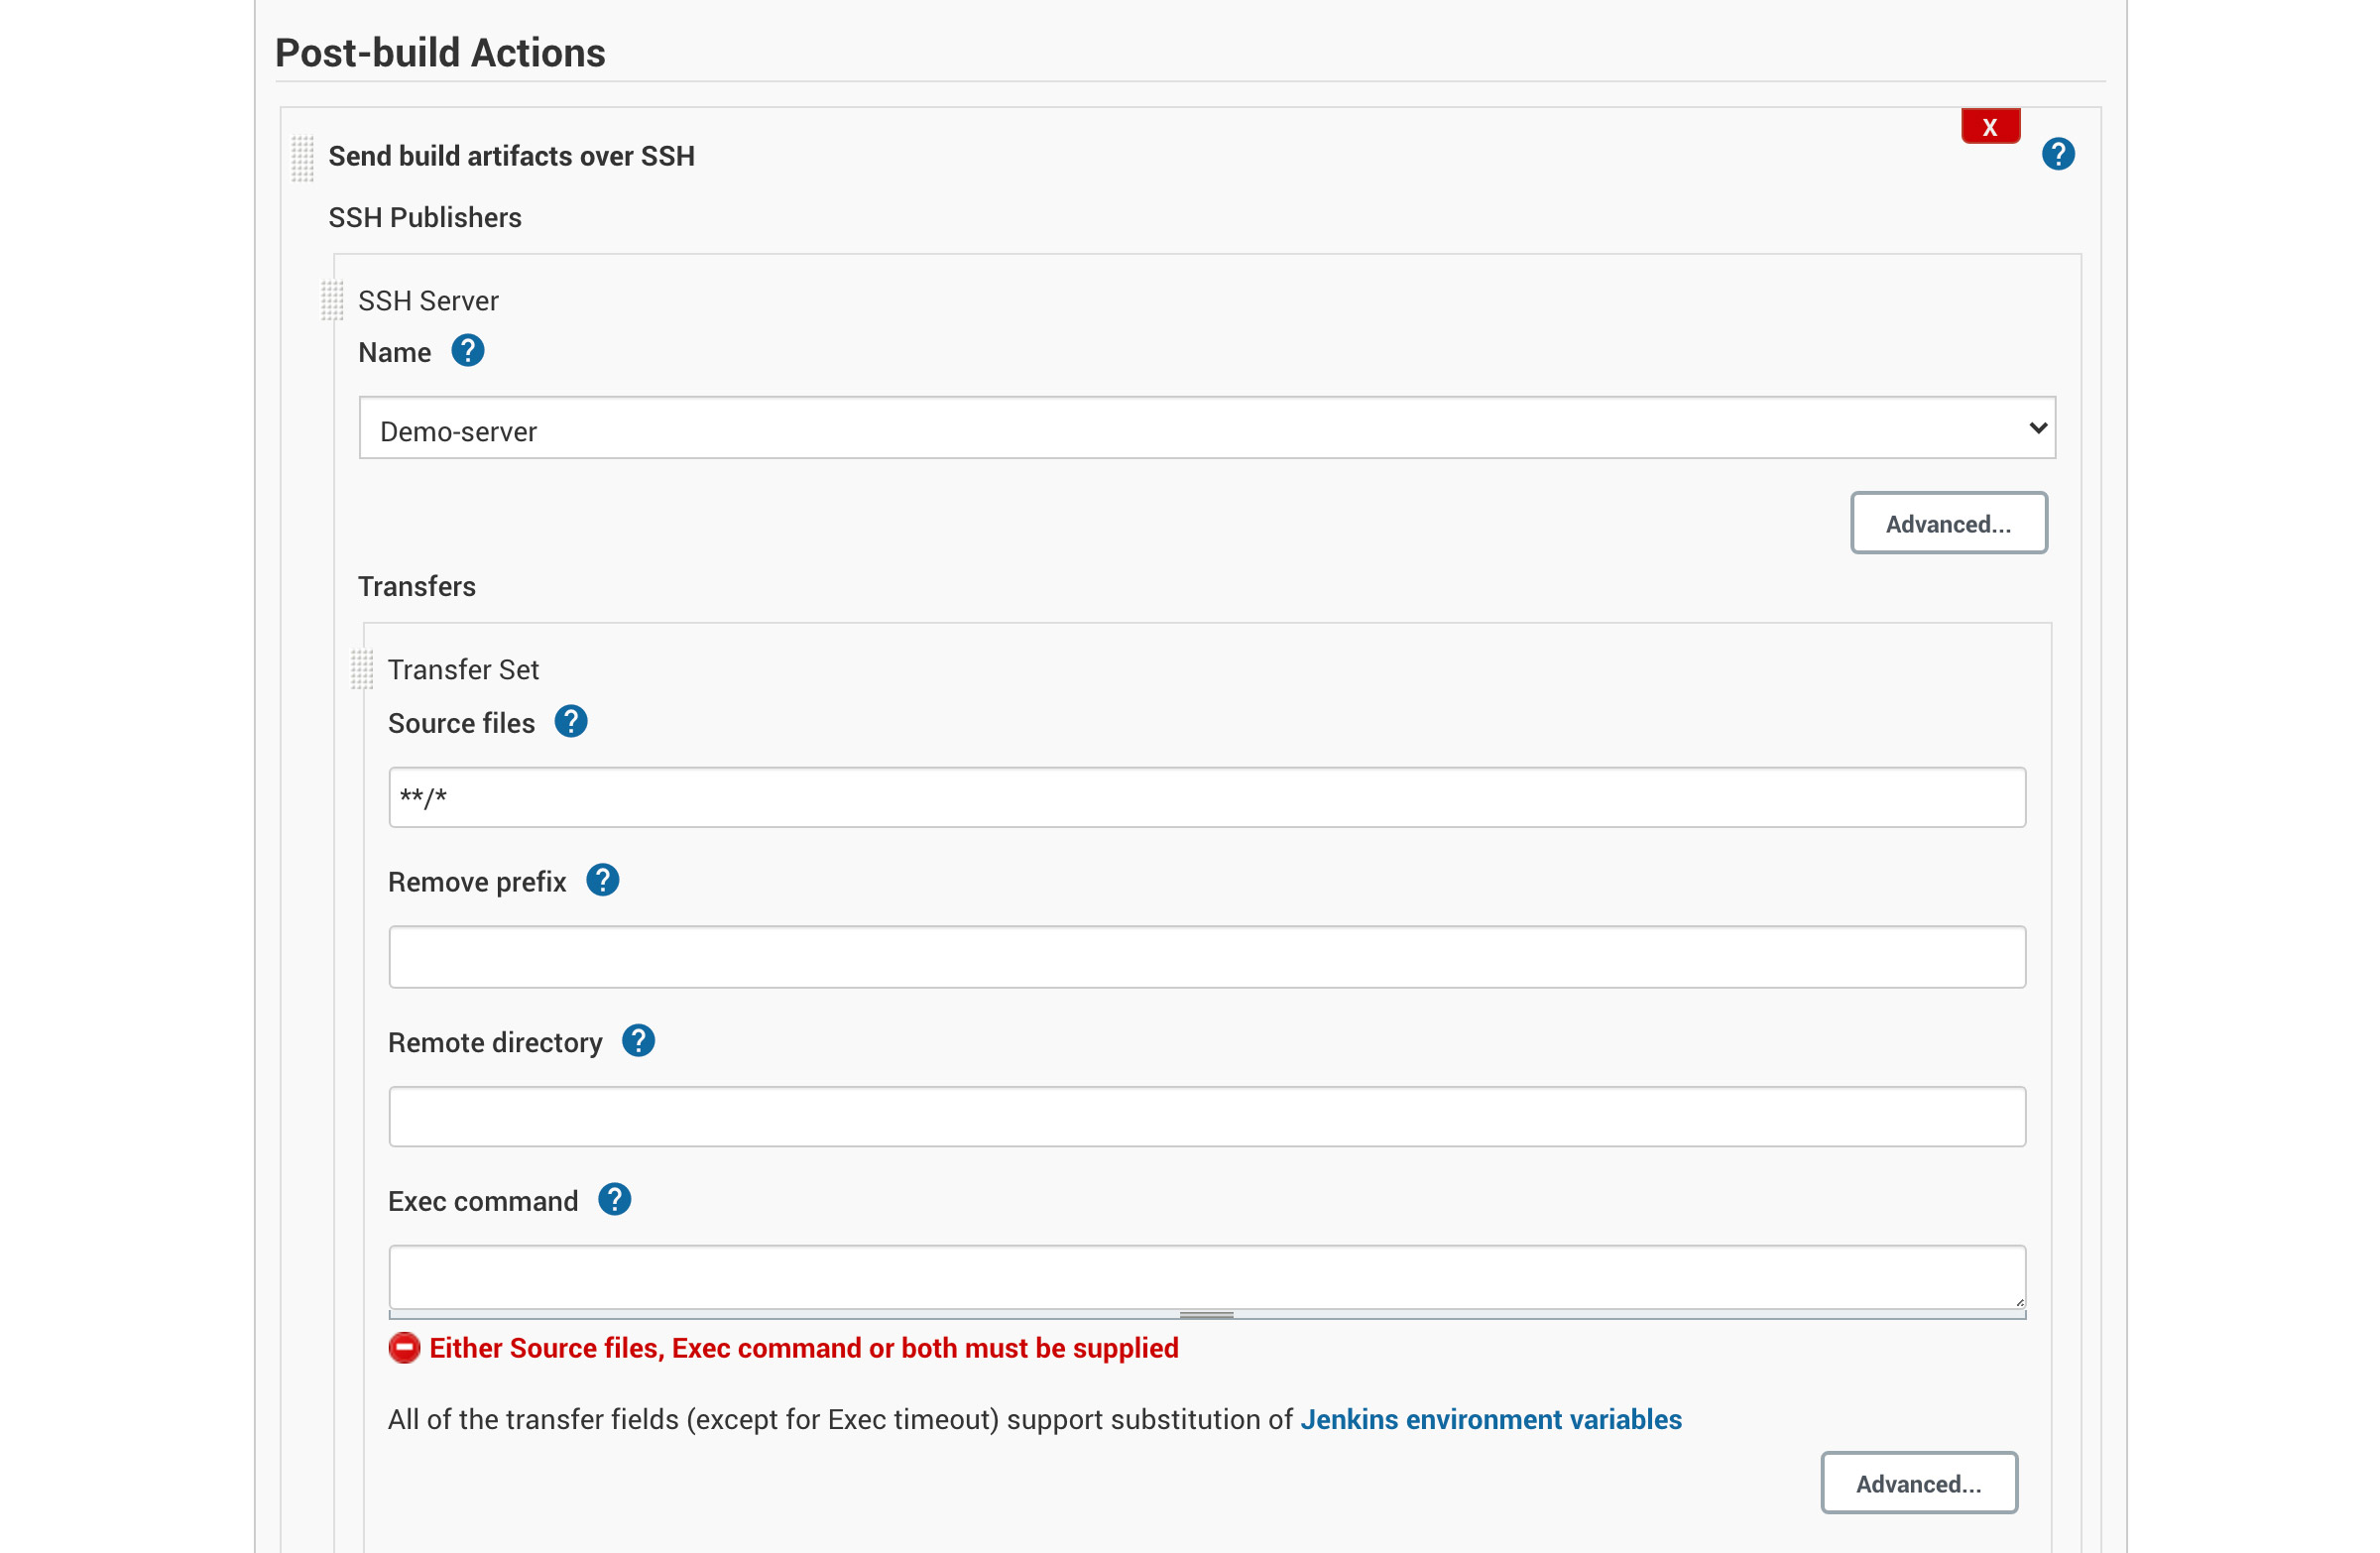
- Click on "Add post-build action" and choose "Send build artifacts over SSH"
- Choose your server in the SSH Server Name dropdown
- Enter the files you want to transfer from the build. Insert the wildcard "**/*" to send everything
- Add exec command and any other setting needed here
- Click on "Save"
Your job is now ready. Push something to Bitbucket to try it out.